Blog

  • Essential Apps For Everyday Users

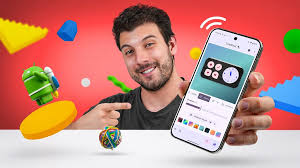
    Finding the right apps can make a big difference. It helps you manage daily life better. This article covers key apps for communication, organization, and common needs. It aims to simplify your digital tools.

    What Are Essential Apps?

    Essential apps are tools you use often. They help with daily tasks. Think of them as digital helpers.

    They make life simpler. These apps aren’t just for fun. They help you get things done.

    They connect you with others. They also help you learn and manage your life.

    These apps cover many needs. They help with work. They help with personal life.

    They can even help you stay healthy. The goal is to use technology smartly. You want tools that help you.

    You don’t want apps that just take up space. We will look at apps that truly matter. They are useful for almost everyone.

    My Own App Struggle

    I remember when my phone felt cluttered. It was full of apps I rarely used. I had games I played once.

    I had social media apps that stressed me out. Finding what I needed was a chore. It took time to scroll through everything.

    I felt overwhelmed. It was like a digital junk drawer.

    One evening, I was trying to find my banking app. It took me five minutes. Five minutes!

    I felt so silly. Why couldn’t I find it faster? That’s when I decided to reset.

    I deleted almost everything. Then, I rebuilt my app library. I focused only on what was truly useful.

    It felt so much better. My phone felt lighter. My mind felt clearer too.

    That experience taught me a lot. It showed me the power of curated tools.

    Key App Categories

    Communication: Stay in touch with friends and family.

    Productivity: Manage tasks and information.

    Utilities: Tools for everyday needs.

    Information: Access news and knowledge.

    Core App Types for Everyone

    There are several types of apps. They help with common needs. Let’s break them down.

    Communication Apps

    Staying connected is important. Communication apps help with this. They let you talk to people.

    You can send messages. You can make calls. Some let you share photos.

    They are a modern way to stay in touch.

    Popular apps include text messaging services. Many also offer video calls. This lets you see your loved ones.

    It feels like they are right there. These apps work over the internet. They are often free to use.

    Communication App Quick Look

    Function: Messaging, Calling, Video Calls.

    Benefit: Keeps you connected with others easily.

    Examples: WhatsApp, Signal, Telegram, FaceTime, Google Meet.

    Productivity Apps

    These apps help you get things done. They manage your time. They organize your tasks.

    They store your notes. They can even help you plan projects. Good productivity apps save you time.

    They reduce stress.

    Think about to-do lists. Or calendar apps. These help you remember things.

    They keep you on track. Many sync across devices. This means your notes are everywhere.

    Your schedule is always up to date.

    Productivity App Features

    Task Management: Create and track to-do lists.

    Note-Taking: Jot down ideas and information.

    Calendar: Schedule appointments and events.

    Reminders: Get alerts for important tasks.

    Utility Apps

    Utility apps are like handy tools. They do specific, useful jobs. A flashlight app is a good example.

    A calculator app is another. You might need an app for weather. Or one to manage your files.

    These apps often come built-in. But there are many advanced options. They help with tasks you do often.

    They make those tasks faster. Or easier. They fill gaps where your device might be lacking.

    Useful Utility Apps

    Calculator: Simple or scientific math.

    Weather: Current conditions and forecasts.

    File Manager: Organize your documents.

    Password Manager: Keep logins safe and easy to access.

    Information and Learning Apps

    The world has so much information. These apps help you access it. You can read news.

    You can learn new things. You can research topics. They are like portable libraries.

    Or personal tutors.

    News apps keep you informed. Learning apps can teach you skills. Reference apps give you quick facts.

    They help you understand the world. They empower you with knowledge.

    Information Apps in Action

    News Aggregators: Get news from many sources.

    Educational Platforms: Learn new subjects or skills.

    Reference Tools: Dictionaries, encyclopedias.

    Maps: Navigate places and explore.

    Real-World Scenarios Where Apps Shine

    Let’s see how these apps fit into daily life. Imagine a busy morning. You check your calendar app.

    It shows your first meeting. Then, you use your messaging app. You send a quick note to a coworker.

    You might use a weather app. It tells you to grab an umbrella.

    Later, you need to buy groceries. You open your notes app. Your shopping list is there.

    You might use a banking app. To check your balance. Or pay a bill.

    These small actions add up. They make the day flow smoothly.

    Consider planning a trip. You use a maps app to find locations. You use a note-taking app.

    To list places to visit. You might use a translation app. If you are going abroad.

    Communication apps help you book things. Or ask questions. It all works together.

    What This Means for You

    Having the right apps is not about having the most. It’s about having the best tools. For your specific needs.

    You want apps that are reliable. They should be easy to use. They should help you save time.

    Or reduce frustration.

    Think about your daily routine. What tasks do you do often? What causes you stress?

    Look for apps that solve those problems. Or make those tasks easier. Don’t feel pressured to use every new app.

    Focus on what truly benefits you.

    Quick App Check

    Ask Yourself:

    1. Do I use this app at least once a week?

    2. Does it make a task easier or faster?

    3. Is it reliable and not buggy?

    4. Does it cause me stress or confusion?

    Essential Apps Breakdown

    Let’s look at specific app examples. These are widely considered essential. They cover many bases.

    Top Communication Apps

    WhatsApp: Very popular for text and calls. Works on many phones. Easy to use with contacts.

    Signal: Known for strong privacy. Good for secure messaging. Also offers calls and video.

    FaceTime: Great for Apple users. High-quality video calls.

    Google Meet: Good for all devices. Excellent for group video calls. Used for work and personal.

    Email Client (e.g., Gmail, Outlook): Still vital for formal communication. Important for accounts and notifications.

    These apps ensure you can reach anyone. They offer different ways to connect. Choose the ones your friends and family use.

    Or the ones that fit your privacy needs.

    Top Productivity Apps

    Google Calendar / Apple Calendar: Essential for scheduling. Lets you see your day, week, month.

    Google Keep / Apple Notes: Simple note-taking. Great for quick ideas. Syncs everywhere.

    Todoist / Microsoft To Do: Powerful to-do list apps. Help you track tasks and projects.

    Google Drive / Dropbox / iCloud Drive: Cloud storage. Keep files safe and accessible. Share documents easily.

    Evernote: More robust note-taking. Good for organizing research or detailed notes.

    These apps help you stay on top of things. They stop you from forgetting tasks. They make your work and personal life more organized.

    Top Utility Apps

    Calculator: Most phones have one built-in. Essential for quick math.

    Weather App: Stay informed about the forecast. Many offer detailed info.

    Password Manager (e.g., LastPass, 1Password, Bitwarden): Crucial for online security. Stores passwords safely.

    Maps App (e.g., Google Maps, Apple Maps): Navigation. Finding places. Exploring new areas.

    Flashlight: Handy for dark situations. Often a quick toggle on your phone.

    File Manager: Helps organize files on your device. Especially useful for Android users.

    These tools are the workhorses. They perform tasks you need done. They are often overlooked.

    But their usefulness is huge.

    Top Information & Learning Apps

    News Apps (e.g., Associated Press, Reuters, BBC News): Get balanced news coverage.

    Wikipedia App: Quick access to vast knowledge.

    Duolingo / Babbel: Learn a new language. Fun and easy to use.

    Coursera / edX: Access courses from universities. Learn new subjects.

    Google Search App: Your gateway to the internet. Powerful search capabilities.

    These apps open up the world. They help you understand things. They support your curiosity.

    And your growth.

    Security First: Password Managers

    What they do: Store all your passwords securely.

    Why they are essential:

    • Create strong, unique passwords for every site.
    • Log in to sites with one click.
    • Protect you from phishing attempts by only filling on known sites.
    • Most offer browser extensions and mobile apps.

    Recommendation: Choose a reputable one. Use a strong master password. Enable two-factor authentication.

    When Apps Go Beyond Essential

    While the above are core, other apps become essential based on your life. A runner might need a fitness tracker app. A parent might need a baby monitor app.

    A musician might need a metronome app.

    It’s about finding the right fit. What helps you live better? What makes your specific life easier?

    Don’t be afraid to explore. But always come back to your core needs.

    For example, I work from home. So, video conferencing apps are essential. But if I worked in an office, maybe less so.

    My need for a robust task manager might be higher. My need for a specific commuting app would be zero.

    Tips for Managing Your Apps

    Having too many apps is a problem. It slows down your device. It makes it hard to find what you need.

    So, here are some tips.

    Declutter Regularly

    Go through your apps every few months. Ask yourself: Do I still use this? Does it add value?

    If not, delete it. It’s that simple. Free up space.

    And mental energy.

    Organize Your Home Screen

    Put your most-used apps in easy reach. Use folders for less-used ones. Keep your home screen clean.

    This makes finding things faster.

    Use Widgets

    Many apps offer widgets. These show useful info on your home screen. Like upcoming calendar events.

    Or weather updates. They save you from opening the app.

    Sync Across Devices

    If you use multiple devices, use apps that sync. This way, your notes are on your phone and computer. Your calendar is everywhere.

    It makes life much smoother.

    Prioritize Security

    Be careful with permissions. What access does the app need? Only grant what’s necessary.

    Keep your apps updated. Updates often include security fixes.

    Common App Questions

    What is the most important app for daily use?

    For most people, a good communication app like WhatsApp or a reliable email client is very important. A calendar app is also crucial for managing your schedule. Your most important app depends on your personal needs and daily tasks.

    Should I pay for apps?

    Many essential apps are free. Some offer paid versions with more features. Consider if the extra cost is worth the benefits for you.

    For utilities like password managers, paying for a good service is often recommended for security.

    How do I choose between similar apps?

    Look at reviews. Try the free versions first. Consider which interface you find easier to use.

    Think about whether you need advanced features. Often, the simplest app that meets your needs is the best choice.

    Are built-in phone apps good enough?

    Often, yes! Your phone likely comes with excellent apps for calls, texts, calendar, notes, and a calculator. For many users, these are perfectly sufficient.

    You only need third-party apps if they offer features the built-in ones lack or if you prefer a different user experience.

    How do I keep my apps safe from hackers?

    Use strong, unique passwords for all apps, especially email and banking. Use a password manager. Enable two-factor authentication whenever possible.

    Be cautious about app permissions and only download from official app stores. Keep your device software and apps updated.

    What are some good apps for staying organized?

    Calendar apps (like Google Calendar or Apple Calendar) are great for scheduling. To-do list apps (like Todoist or Microsoft To Do) help manage tasks. Note-taking apps (like Google Keep or Apple Notes) are useful for jotting down ideas and information.

    Cloud storage apps (like Google Drive or Dropbox) help organize files.

    Final Thoughts

    Building a useful app collection is a journey. It’s about finding tools that serve you. Focus on communication, productivity, and essential utilities.

    Keep your phone clean. And your digital life simple. The right apps can truly improve your day.

  • How To Organize Files Efficiently

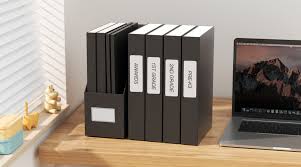
    Organizing files efficiently means creating a clear system. This system helps you find digital documents and physical items quickly. It reduces stress and saves time by grouping related items.

    A good system is easy to maintain and fits your daily habits.

    What is File Organization?

    File organization is simply putting things in order. For your computer, it means arranging digital files. You sort them into folders.

    You name them well. For your home, it means arranging physical items. You put things in drawers or on shelves.

    Everything has a place. It’s about making sense of the chaos. It stops things from getting lost.

    It makes your space work for you.

    Think about your kitchen. If spices were just dumped in a bag, cooking would be hard. But if they are in a spice rack, you find what you need fast.

    File organization does the same for your life. It’s a way to manage information and items.

    Why Does Organizing Files Matter So Much?

    Good organization is like a superpower. It saves you precious time. Imagine looking for a bill.

    You know it’s somewhere. But you search for ten minutes. That’s ten minutes lost forever.

    Efficient organization means you grab it in seconds.

    It also cuts down on stress. A messy space feels overwhelming. It adds to your mental load.

    When things are neat, your mind feels clearer. You can focus better. Productivity goes up.

    You feel more in control.

    For your digital life, this means finding that important document. It means not sending the wrong version of a report. For your home, it means finding your keys.

    It means knowing where your tax forms are. It’s about peace of mind. It helps you do more with less effort.

    My Own Digital Disaster

    I remember one time, I was working late. I had a huge project deadline. I needed a specific image.

    I knew I had it saved somewhere. My desktop was a disaster. It was filled with random files.

    There were screenshots, old documents, and half-finished designs. I clicked through folders. I searched my whole computer.

    Panic started to set in. It was nearly midnight. The client needed the final files soon.

    I felt sick. My heart was pounding. I had wasted almost an hour.

    That image was crucial. I finally found it. It was buried in a folder named “Misc_Stuff_2021.” It was a ridiculous name.

    I learned a big lesson that night. A messy digital space is just as bad as a messy physical one. It costs you time and sanity.

    From that night on, I decided to get serious about my file organization. It’s changed my workflow completely. I don’t miss deadlines anymore because I can’t find things.

    Digital File Sorting Tips

    Main Folder: Start with a few main folders. Think “Work,” “Personal,” “Projects,” “Finance.”

    Subfolders: Break down main folders. “Work” could have “Clients,” “Reports,” “Meetings.”

    Clear Names: Use descriptive names for files. Include dates. Like “Report_Q3_2024.pdf” not “Doc1.pdf.”

    Delete Often: Get rid of old, unneeded files. They just create clutter.

    How to Organize Digital Files Effectively

    Let’s dive into the digital world first. This is where many people struggle. Every day, we create and download files.

    They can quickly pile up. We need a system that works. A system that is easy to follow.

    The first step is to create a top-level structure. Think about the main areas of your digital life. What are the big categories?

    For most people, this includes work and personal life. Maybe you have hobbies or school. Set up a few main folders on your computer.

    These will be your starting points.

    Common top-level folders include: Work, Personal, Projects, Finance, Photos, and Downloads. It sounds simple, but just having these is a huge step. Don’t go overboard with too many main folders.

    Keep it manageable.

    Creating Smart Subfolders

    Once you have your main folders, it’s time for subfolders. This is where the real organization happens. Think about how you naturally look for things.

    Within your “Work” folder, what kind of work do you do? You might have folders for different clients.

    Or, you might have folders for different types of projects. If you’re a writer, you might have folders for “Articles,” “Blog Posts,” and “Scripts.” If you’re a designer, maybe “Logos,” “Websites,” and “Branding.”

    The key is to make these subfolders logical. They should reflect how your brain works. Don’t create a subfolder for every single file.

    That just creates too many clicks. Aim for depth, but not excessive depth. Three to five levels of folders deep is usually enough.

    The Power of Naming Conventions

    File names are super important. A file named “Document.docx” tells you nothing. A file named “ClientX_Proposal_v3_2024-10-26.docx” tells you everything.

    You know the client, what it is, its version, and when it was made.

    Develop a naming convention. This is a set of rules for naming your files. Here are some ideas:

    • Use Dates: Put the date first, like YYYY-MM-DD. This sorts files chronologically.
    • Include Project Name: If a file belongs to a project, add the project name.
    • Describe Content: What is in the file? Be specific.
    • Version Numbers: Use v1, v2, v3 or similar for different versions.
    • Avoid Special Characters: Stick to letters, numbers, hyphens, and underscores. Symbols can cause problems.

    It might seem like extra work at first. But it saves so much time later. You won’t have to open ten files to find the right one.

    You’ll know just by looking at the name.

    Dealing with the Downloads Folder

    The Downloads folder is a black hole for many. Files download there and are never seen again. You need a strategy for it.

    Treat it as a temporary holding space. Don’t let files live there long-term.

    When you download something, ask yourself: “Where does this really belong?” Then, move it. If it’s a document for work, move it to your Work folder. If it’s a photo, move it to your Photos folder.

    If you don’t have a clear place for it, make one. Or, if it’s something you downloaded just to look at once, consider if you need it at all. Be ruthless about deleting.

    Regularly clear out your Downloads folder.

    Cloud Storage and Synchronization

    Using cloud storage like Google Drive, Dropbox, or OneDrive can be a game-changer. These services sync files across devices. They also offer backup.

    When you organize files in your cloud folder, they are organized everywhere.

    The same principles apply. Create your main folders. Use clear subfolders.

    Maintain your naming conventions. The benefit here is accessibility. You can get to your files from your phone, tablet, or any computer.

    This makes organization even more powerful.

    Think about setting up cloud storage to mirror your computer’s structure. This way, when you move a file on your laptop, it moves in the cloud too. This keeps everything consistent and accessible.

    My Cloud Setup Example

    Cloud Service: Google Drive

    Main Folders:

    • 01_Work (The numbers help order folders)
    • 02_Personal
    • 03_Projects
    • 04_Finance
    • 05_Photos
    • 06_Archive (For old stuff I might need)

    Inside 01_Work:

    • Clients (Each client gets a subfolder)
    • Reports (Quarterly, Annual)
    • Meetings (Meeting notes by date)

    Inside 02_Personal:

    • Documents (Resumes, important papers)
    • Health (Medical records, insurance)
    • Education (Certificates, old assignments)

    This structure makes it super easy to find anything. The numbers put the most important folders at the top.

    Organizing Your Physical Space: The Home Edition

    Now, let’s talk about the physical world. Clutter at home can be just as distracting as digital mess. Piles on the counter.

    Drawers that won’t close. Closets bursting at the seams. It all takes a toll.

    The principles are surprisingly similar to digital organization. We need categories. We need designated spots.

    We need easy ways to put things back. It starts with seeing your space clearly.

    Walk through your home. What areas bother you the most? Is it the kitchen counter?

    The entryway? Your desk? Pick one area to start.

    Don’t try to do everything at once. Small wins build momentum.

    The “One In, One Out” Rule

    This is a simple rule that helps prevent clutter buildup. For every new item that comes into your home, one similar item must leave. Bought a new shirt?

    Donate an old one. Got a new gadget? Sell or give away the old one.

    It sounds strict, but it works. It forces you to be mindful of what you bring in. It ensures you don’t just accumulate things endlessly.

    This is especially helpful for clothes, books, and gadgets.

    Zone Your Space

    Just like digital folders, create zones for your home. Think about what you do in each area. In the kitchen, you have zones for cooking, cleaning, and eating.

    In the bedroom, zones for sleeping, dressing, and storing clothes.

    Within these zones, assign specific places for items. Use drawer dividers. Use shelf organizers.

    Use bins and baskets. The goal is to give everything a home. When something doesn’t have a home, it tends to end up on a surface.

    For example, in your entryway, you might have a hook for keys, a small tray for mail, and a shoe rack. This prevents keys from getting lost and mail from piling up.

    Entryway Organizer Idea

    Item: Keys

    Home: Wall-mounted key hook near the door.

    Item: Mail

    Home: A small basket or tray on a console table.

    Item: Shoes

    Home: A shoe rack or bench with storage.

    Item: Coats/Jackets

    Home: Hooks on the wall or a coat rack.

    Containment is Key

    Containers are your best friend in physical organization. Bins, baskets, boxes, drawer dividers – they all help. They keep similar items together.

    They create neat stacks. They make spaces look tidy.

    When choosing containers, think about visibility. Clear containers let you see what’s inside easily. If you use opaque containers, label them clearly.

    This is crucial so you don’t have to open every box.

    For things like pantry items, use clear jars. For craft supplies, use small bins. For toys, use large baskets.

    It’s about creating visual order. This makes the space feel calmer.

    The Power of Decluttering

    Before you can organize, you often need to declutter. This means getting rid of things you don’t use, need, or love. It’s a tough process for many.

    We attach memories or future intentions to items.

    A good decluttering method is to ask yourself these questions for each item:

    • When did I last use this? (If it’s been over a year, consider letting it go.)
    • Do I really need this?
    • Do I have duplicates?
    • Does this item bring me joy or serve a clear purpose?
    • Would I buy this again today?

    Sort items into piles: Keep, Donate, Sell, Trash/Recycle. Be honest with yourself. Less stuff means less to organize.

    Less stuff means a more peaceful home.

    Make it Easy to Put Away

    The best organization system is one you’ll actually use. This means making it as easy as possible to put things back in their place. If it takes too much effort, you’ll likely stop doing it.

    Keep frequently used items accessible. Store rarely used items out of the way. For example, keep your everyday coffee mug on the counter.

    Store the fancy teacups you use once a year on a higher shelf.

    Consider the flow of your home. Where do you usually drop your keys? Put a key hook or tray nearby.

    Where do you sort mail? Have a mail station there. Make the “put away” action natural.

    Pantry Organization Quick Scan

    Category: Grains (Rice, Pasta)

    Container: Airtight clear canisters.

    Location: Middle shelf, easy to reach.

    Category: Spices

    Container: Tiered rack or drawer insert.

    Location: Near the stove.

    Category: Canned Goods

    Container: Stackable bins or lazy susan.

    Location: Lower shelves for easier access.

    Integrating Digital and Physical Organization

    Often, our digital and physical lives are intertwined. You might have digital documents that relate to physical items, like warranties for appliances. Or you might have receipts you need to file digitally.

    The goal is to have a consistent approach. If you’re creating a digital folder for “Home Warranties,” make sure you have a clear spot for the physical warranty documents too. Maybe a dedicated folder in a filing cabinet or a binder.

    Think about the lifespan of information. A digital photo of a birth certificate is useful, but you might still need the original paper. Decide where the official record lives.

    Is it digital, physical, or both?

    Handling Paperwork

    Paper is a big challenge for many. Bills, statements, important documents, kids’ school papers. A good system is essential.

    Many people benefit from a simple filing system.

    Action Files: A small inbox for papers that need immediate action. Like bills to pay, forms to sign.

    Filing System: Use folders for categories like “Taxes,” “Medical,” “Home,” “Vehicle.” Keep it simple.

    Archive: Once a year, review old files. Move older, less-needed documents to an archive box. Store it somewhere out of the way.

    Shredding: Safely dispose of sensitive documents you no longer need.

    Try to process incoming paper daily. Don’t let it build up. Deal with it as soon as possible.

    File it, act on it, or toss it.

    Maintaining Your Organized Systems

    Setting up a system is only half the battle. The real work is keeping it going. Systems fall apart when they become too much effort or when life gets busy.

    Consistency is key. Dedicate a few minutes each day or week to maintenance. This could be tidying your desk.

    It could be sorting through your Downloads folder. It could be putting mail away immediately.

    Schedule Regular Check-ins

    Set aside time for deeper organization tasks. Once a month, review your digital folders. Delete old files you don’t need.

    Check your physical spaces. Declutter a drawer or a shelf.

    These regular check-ins prevent minor issues from becoming major problems. It’s like cleaning your house. Little bits of cleaning keep it manageable.

    Big cleanups are overwhelming.

    Be Realistic About Perfection

    Your organized system doesn’t need to be perfect. Life happens. Sometimes things get messy.

    The important thing is that you have a system to fall back on. You know how to get things back in order.

    Don’t beat yourself up if you slip. Just get back on track. The goal is efficiency and peace of mind, not a museum display.

    Your system should serve you, not the other way around.

    Daily Tidy Up Routine

    Action: Clear your computer desktop.

    Time: 2 minutes.

    Action: Sort mail received.

    Time: 3 minutes.

    Action: Put away items not in their place.

    Time: 5 minutes.

    Action: Empty trash/recycling bin.

    Time: 1 minute.

    Total time: About 11 minutes. This small effort makes a big difference.

    What This Means for You

    Having organized files, both digital and physical, means a more streamlined life. You’ll spend less time searching and more time doing what matters. Stress levels will likely drop.

    When is it normal to have a messy desk? Maybe for a few hours during a big project. But if your desk is always covered, it’s a sign your system needs work.

    When is it okay to have lots of digital files? Only if you can find them all quickly. If you’re constantly losing things, it’s time to act.

    Simple checks include opening your main digital folders. Do they make sense? Are they easy to navigate?

    For physical spaces, open a drawer you rarely use. Is it organized, or a jumbled mess? These quick checks reveal areas needing attention.

    Tips for Better File Organization

    Here are some quick tips to help you get started or improve your current system:

    • Start Small: Pick one area to organize first. Don’t get overwhelmed.
    • Be Consistent: Make organization a habit, not a one-time event.
    • Use Labels: For physical items and digital folders. Clear labels save time.
    • Declutter First: Get rid of things you don’t need before organizing.
    • Review Regularly: Schedule time to maintain your systems.
    • Use Search Wisely: Learn to use your computer’s search function effectively. Good file names make search powerful.
    • Automate When Possible: Use tools that can help sort or organize.

    Frequently Asked Questions About Organizing Files

    What is the best way to organize digital files?

    The best way is to create a logical folder structure. Use descriptive file names. Develop a consistent naming convention.

    Regularly declutter and maintain your system. Cloud storage can also help sync and access files.

    How often should I organize my computer files?

    Aim for ongoing maintenance. Sort new downloads daily. Review and clean up folders weekly or monthly.

    A deep clean can happen quarterly or yearly. Consistency is more important than a single large effort.

    What if I have too many physical items to organize?

    Start with decluttering. Get rid of things you don’t use or need. Then, focus on one small area at a time.

    Use containers and labels to keep things tidy. The “one in, one out” rule helps prevent future clutter.

    How do I organize photos on my computer?

    Create folders by year and then by event or month. Use descriptive file names that include dates and events (e.g., “2024-07-15_SummerVacation_BeachDay.jpg”). Cloud services like Google Photos or Apple Photos can help with automatic sorting and tagging.

    What is a good naming convention for files?

    A good convention includes dates (YYYY-MM-DD), project names, and clear descriptions. For example: “ProjectAlpha_MeetingNotes_2024-10-26.docx”. Avoid generic names like “Document” or “Final”.

    How can I organize my email inbox?

    Use folders or labels to sort emails. Archive emails you no longer need to see. Unsubscribe from unwanted newsletters.

    Aim to process your inbox daily, acting on emails or filing them away.

    Conclusion

    Organizing your files, whether digital or physical, is a journey. It’s about creating systems that work for you. Systems that reduce stress and boost your productivity.

    Start with small steps. Be consistent. Your future self will thank you for the order and calm you create today.

  • Productivity Software Comparison

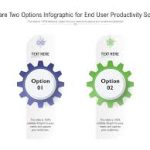
    Understanding the vast world of productivity software can feel overwhelming. The goal is to find tools that streamline your work, not add to it. This comparison focuses on helping you identify software that fits your specific needs, from project management to team communication and time tracking, ensuring you make an informed choice.

    What is Productivity Software?

    Productivity software is a broad term. It covers computer programs. These programs help people do tasks better.

    They often make work faster. They can also make work more organized. Think of tools that help you manage projects.

    Others help teams talk to each other. Some tools track how long you spend on things. All of them aim to make you more efficient.

    Why does it matter so much today? We have more digital tools than ever. But sometimes, too many tools make things worse.

    They can cause confusion. They can lead to wasted time. Choosing the right software is key.

    It helps you focus on what’s important. It lets you get more done with less effort.

    This software can cover many areas. It includes task management. It also covers communication.

    Document creation is another area. Even time tracking falls under this umbrella. The goal is always the same: boost output.

    It also helps improve work quality. This guide breaks down the choices.

    My Own Struggle with Too Many Tools

    I remember a time early in my career. I felt like I was juggling chainsaws. My inbox was overflowing.

    I had sticky notes everywhere. My team used three different chat apps. We also used two project boards.

    No one knew which one to use. Emails got lost. Tasks fell through the cracks.

    I spent more time looking for information. I spent less time actually doing the work.

    One Tuesday, I had a deadline. I needed a file from a colleague. I couldn’t remember if she sent it by email.

    Or maybe it was on the shared drive. Or perhaps she posted it in the “urgent” chat channel. Panic started to set in.

    My heart pounded. I could feel sweat on my brow. It felt like my brain was a tangled ball of yarn.

    This mess was costing us clients. It was costing us sanity.

    That day, I decided something had to change. I knew I needed a better system. I needed tools that worked together.

    Or at least, tools that were simple to understand. It took weeks of research. I tested many things.

    Some were too complex. Others didn’t do enough. I learned that more wasn’t always better.

    Simpler, focused tools often won.

    Key Software Categories

    Project Management: Tools like Asana, Trello, Monday.com. They help plan, track, and manage projects. You can see who is doing what.

    You can set deadlines.

    Communication: Apps like Slack, Microsoft Teams. They help teams talk in real-time. They reduce email clutter.

    They allow quick questions and answers.

    Document Collaboration: Google Workspace, Microsoft 365. These let multiple people work on documents. They save changes.

    They track versions.

    Time Tracking: Toggl Track, Clockify. These record how long tasks take. This helps with billing and understanding workflows.

    Understanding Your Needs First

    Before looking at software, think about your problems. What are your biggest work slowdowns? Is it too many emails?

    Do you lose track of tasks? Does your team struggle to communicate? Knowing this helps you pick the right tool.

    Think about your team size. Are you a solo worker? Or do you have a large group?

    Some software is better for individuals. Others are built for big teams. Cost is also a factor.

    Many tools have free versions. Paid versions offer more features. Set a budget if you can.

    Consider how easy it is to use. If a tool is hard to learn, people won’t use it. This defeats the purpose.

    Look for software with a clean design. It should feel intuitive. Most tools offer free trials.

    Use them to test out the software. See if it feels right for you.

    Quick Self-Assessment Questions

    What’s your main goal? Get organized? Improve team sync? Track time better?

    Who will use it? Just you? A small team? A large department?

    What’s your budget? Free? Low cost? Premium features needed?

    What tools do you already use? Can the new software connect with them?

    Popular Productivity Software Categories and Examples

    Let’s dive deeper into the types of software. Each type solves different problems. We’ll give examples you might know.

    Project Management Software

    This is a big one for many teams. Project management tools help you plan. They help you organize.

    They let you assign tasks. You can set due dates. You can see the progress of work.

    This keeps everyone on the same page. It stops tasks from being forgotten.

    Key features to look for:

    • Task creation and assignment
    • Deadline setting and tracking
    • Progress visualization (like Kanban boards or Gantt charts)
    • Team collaboration features
    • Reporting and analytics

    Popular examples:

    • Trello: Uses simple cards and boards. Great for visual thinkers. Easy to learn.
    • Asana: More robust. Offers different views like lists, boards, and calendars. Good for complex projects.
    • Monday.com: Highly customizable. Can be used for project management and other workflows. Visually appealing.
    • Jira: Very popular for software development teams. Powerful but can be complex for general use.

    Trello vs. Asana: A Quick Look

    Trello

    Ease of Use: Very High

    Best For: Small teams, simple projects, visual task tracking.

    Learning Curve: Minimal

    Asana

    Ease of Use: High

    Best For: Growing teams, medium to complex projects, structured workflows.

    Learning Curve: Moderate

    Team Communication and Collaboration Tools

    Email can be slow and messy. These tools offer instant messaging. They allow file sharing.

    They can create channels for different topics. This makes it easy to talk to your team. It also helps keep conversations organized.

    Good communication tools cut down on meetings. They make asking quick questions simple. They also help build team connection.

    Especially important for remote teams.

    Key features:

    • Direct messaging and group chats
    • Channels for specific topics or teams
    • File sharing and document previews
    • Video and voice calls
    • Integrations with other tools

    Popular examples:

    • Slack: Very popular. Offers lots of integrations. Great for companies of all sizes.
    • Microsoft Teams: Part of the Microsoft 365 suite. Good for businesses already using Microsoft products.
    • Google Chat: For Google Workspace users. Simple and integrated.
    • Discord: Originally for gamers. Now used by many communities and teams. Offers voice channels.

    When to Use Chat vs. Email

    Use Chat for:

    • Quick questions
    • Urgent updates
    • Team discussions
    • Informal check-ins

    Use Email for:

    • Formal communication
    • External contacts
    • Detailed reports
    • Information that needs a clear record

    Document Creation and Collaboration Platforms

    Working on documents together is common. These platforms let multiple people edit a file. They show changes in real-time.

    They keep a history of edits. This avoids confusion about “final” versions.

    These tools are vital for teamwork. They ensure everyone works from the latest information. They make feedback easier.

    Key features:

    • Real-time co-editing
    • Version history tracking
    • Commenting and suggestion features
    • Cloud storage and access
    • Permissions management

    Popular examples:

    • Google Workspace (Docs, Sheets, Slides): Very widely used. Excellent for real-time collaboration. Free for personal use.
    • Microsoft 365 (Word, Excel, PowerPoint): Industry standard for many businesses. Powerful features.
    • Dropbox Paper: Simple and clean interface. Focuses on document creation and team notes.
    • Notion: More than just documents. Combines notes, wikis, and project management. Very flexible.

    Time Tracking and Management Tools

    Knowing where your time goes is powerful. Time tracking software helps you see this. You can start timers for tasks.

    Or you can log time manually. This data is useful for many reasons. It helps with billing clients.

    It shows where you might be wasting time. It helps you estimate future tasks better.

    These tools can also include features like scheduling. Some help block distracting websites. They promote focus.

    Key features:

    • Start/stop timers
    • Manual time entry
    • Project and task categorization
    • Reporting on time spent
    • Integration with billing or payroll

    Popular examples:

    • Toggl Track: Very popular for its ease of use. Simple interface. Great for freelancers and teams.
    • Clockify: Offers a generous free tier. Good for teams needing basic time tracking.
    • RescueTime: Focuses on productivity analysis. Tracks computer usage automatically.
    • Harvest: Combines time tracking with invoicing and project budgeting.

    Time Tracking Benefits

    • Accurate Billing: Charge clients precisely for work done.
    • Improved Estimates: Better predict how long new tasks will take.
    • Identify Time Sinks: See where time is wasted.
    • Boost Focus: Awareness of time can encourage efficiency.
    • Project Profitability: Understand the cost of projects.

    All-in-One vs. Specialized Tools

    This is a big decision. Do you want one tool that does almost everything? Or do you prefer a few tools that do specific things really well?

    All-in-one platforms aim to be your central hub. They might combine project management, chat, and document features. This can be convenient.

    It might reduce the number of subscriptions. It can offer seamless integration between its own modules.

    Specialized tools focus on one area. For example, you might use Slack for chat. You might use Trello for tasks.

    You might use Google Docs for writing. The benefit here is often depth. A specialized tool might be better at its core function than an all-in-one’s version of that function.

    For small teams or individuals, an all-in-one might be simpler. For larger or more complex operations, a combination of specialized tools might be more powerful. Many tools now integrate well.

    So you can often connect a specialized chat app to a specialized project manager.

    Pros and Cons Comparison

    All-in-One Platforms

    Pros: Simplicity, fewer subscriptions, integrated workflows.

    Cons: May lack depth in certain areas, can be feature-heavy, less flexibility.

    Specialized Tools

    Pros: Deep functionality, best-in-class features, flexibility in choice.

    Cons: More subscriptions, potential integration issues, learning multiple tools.

    Factors to Consider When Choosing

    We’ve touched on some points. Let’s make them clearer. Choosing the right software is important.

    It affects your daily work.

    Ease of Use and Learning Curve

    If a tool is hard to use, people won’t adopt it. This is a huge problem. Look for clean interfaces.

    Try out the free versions. See how easy it is to perform common tasks. A steep learning curve can kill productivity.

    It can frustrate your team. Keep it simple, especially at first.

    Integrations with Existing Tools

    Your new software likely won’t work alone. Does it connect with your email? Does it talk to your calendar?

    Can it share files with your cloud storage? Good integrations save time. They prevent data silos.

    Check if the software supports Zapier or IFTTT. These services connect many different apps.

    Scalability

    Will the software grow with your needs? If you’re a startup, you might grow fast. Can the tool handle more users?

    Can it handle more complex projects? Or will you need to switch soon?

    Many tools offer different pricing tiers. These tiers often unlock more features or capacity. Choose something that can scale.

    This avoids costly migrations later.

    Cost and Value

    Price is always a factor. But don’t just look at the lowest cost. Consider the value.

    What features do you get for the price? Does it save you more time than it costs? Free versions are great for starting.

    But sometimes, paid features are essential.

    Look at the total cost of ownership. This includes subscription fees. It also includes training time.

    Think about how much productivity gain you expect. Does it justify the expense?

    Pricing Models Explained

    Free: Basic features, limited users, or time. Great for individuals or very small teams.

    Freemium: Core features are free. Premium features require payment.

    Per User/Month: You pay a set amount for each person using the software.

    Tiered Pricing: Different feature sets and user limits at different price points.

    One-time Purchase: Less common now, but some desktop software is bought outright.

    Security and Reliability

    Are you putting sensitive company data into this software? Security is crucial. Check their privacy policy.

    Do they use encryption? Where is the data stored? For most cloud software, this is handled by the provider.

    Reliability matters too. Will the software be available when you need it? Look for uptime guarantees.

    Downtime means lost productivity. Reputable providers have high uptime. They also have good customer support.

    Real-World Scenarios and Software Choices

    Let’s see how different situations might lead to different software picks.

    Scenario 1: The Solopreneur Freelancer

    Imagine you’re a freelance writer. You manage your own clients. You handle your own projects.

    You send your own invoices. Your main needs are task management. You also need simple client communication.

    And perhaps time tracking for billing.

    Likely Choices:

    • Task Management: Trello or Todoist. Simple, visual, and easy to manage personal tasks.
    • Time Tracking: Toggl Track or Clockify. Easy to start and stop timers.
    • Documents: Google Workspace. For writing proposals and articles.
    • Communication: Email or maybe a lightweight CRM.

    Why: Focus on low cost, ease of use, and essential features. No need for complex team features.

    Scenario 2: A Small Marketing Agency (5-10 people)

    This team needs to manage multiple client projects. They need to collaborate on content. They need to communicate quickly.

    They also need to track time for billing clients accurately.

    Likely Choices:

    • Project Management: Asana or Monday.com. Offers better oversight for multiple projects and clients.
    • Communication: Slack. For rapid team chat and client communication channels.
    • Documents: Google Workspace or Microsoft 365. For collaborative content creation.
    • Time Tracking: Harvest or Toggl Track (with projects). Integrates billing and time.

    Why: Needs a balance of features. Integration is key. Project management needs to be robust for clients.

    Scenario 3: A Growing Tech Startup (20-50 people)

    This team works on product development. They need project tracking for sprints. They need robust internal communication.

    Code collaboration is also important. They might use specific developer tools.

    Likely Choices:

    • Project Management: Jira. Industry standard for software development.
    • Communication: Slack or Microsoft Teams. For fast internal comms.
    • Documents: Confluence (for documentation) or Google Workspace.
    • Code Collaboration: GitHub or GitLab.
    • Knowledge Base: Notion or Confluence.

    Why: Needs specialized tools for development. Scalability and integration between developer tools are important.

    My Personal Software Stack Example

    As a blogger and SEO specialist, my stack looks like this:

    • Writing & Research: Google Docs, Grammarly, Google Search.
    • Organization: Trello (for content calendar), Evernote (for notes).
    • Communication: Slack (with clients and partners).
    • SEO Tools: SEMrush, Ahrefs (specialized).
    • Project Management: Asana (for larger projects).

    I use specialized tools for my core work (SEO). I use simpler tools for organization and writing.

    What This Means for You: Making the Choice

    Choosing the right productivity software isn’t a one-time event. It’s an ongoing process. Your needs will change.

    The software landscape also changes.

    When is it normal to switch? If a tool is consistently slowing you down. If it doesn’t have features you desperately need. If it becomes too expensive for the value it provides.

    If your team struggles to use it.

    When should you worry? If people are spending more time troubleshooting the software than using it. If key tasks are being missed because of the tool. If morale drops because of the complexity.

    Simple checks:

    • Review your current tools: Are you using them to their full potential?
    • Talk to your team: What are their pain points with current tools?
    • Test new software: Use free trials. Involve key users.
    • Start small: Implement one new tool at a time.

    Quick Tips for Boosting Productivity with Software

    Having the software is only half the battle. Using it wisely is the other half.

    • Set up your dashboard: Make your most-used features easy to find.
    • Use templates: For recurring tasks or projects, templates save time.
    • Automate where possible: Use integrations or built-in automation.
    • Keep it clean: Archive old projects. Delete unnecessary tasks.
    • Train your team: Ensure everyone knows how to use the tools effectively.
    • Regularly review: Check if your tools still meet your needs.

    Focusing on Simplicity

    Don’t get caught up in having every possible feature. Ask yourself:

    Does this help me do my core job better?

    If the answer is yes, it’s probably a good fit. If it adds complexity without clear benefit, look elsewhere. Simplicity often wins in the long run.

    Frequently Asked Questions About Productivity Software

    What is the best productivity software for a small business?

    The “best” depends on your specific needs. For general task management and communication, Google Workspace and Slack are excellent starting points. If you need project management, Asana or Trello are very popular.

    For freelancers, a combination like Toggl Track for time and Todoist for tasks can work well. Always test free trials.

    Can productivity software really make me more efficient?

    Yes, when chosen and used correctly. Productivity software helps organize tasks, streamline communication, and reduce distractions. It automates repetitive actions.

    This frees up your time and mental energy. However, the software itself isn’t magic. You still need good work habits.

    How much should I spend on productivity software?

    This varies greatly. Many excellent tools offer free plans for individuals or small teams. Paid plans can range from a few dollars per user per month to much more.

    Focus on the value and time saved. A tool that saves you hours a week is worth paying for. Start with free options and upgrade as needed.

    What’s the difference between project management software and task management software?

    Task management software focuses on individual tasks. It helps you list, organize, and complete to-dos. Project management software is broader.

    It manages larger initiatives with multiple tasks, timelines, resources, and team members. It often includes features like Gantt charts and progress tracking for an entire project.

    Is it better to have one all-in-one tool or several specialized tools?

    It depends on your team’s size and complexity. Small teams or individuals might prefer an all-in-one for simplicity. Larger or more specialized teams might benefit from best-in-class specialized tools that integrate well.

    Consider ease of use and integration needs.

    How do I choose software if I don’t know where to start?

    Start by identifying your biggest workflow problems. What takes up too much time? What causes mistakes?

    Then, research software categories that address those problems. Look at popular options in those categories and try their free versions. Talk to other professionals about what they use.

    Final Thoughts on Choosing Your Tools

    Finding the right productivity software is a journey. It requires understanding your own work. It needs a bit of research.

    Don’t rush the decision. Test options. See what feels right.

    The goal is simple: tools that help you focus. They should help you get your best work done. Happy working!

  • Best Note Taking Apps

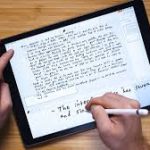
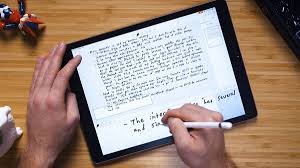
    The best note taking apps help you capture, organize, and find your thoughts easily. They offer features like cross-device syncing, rich text formatting, and search. Choosing the right one depends on your personal workflow and specific needs.

    What Makes a Great Note Taking App?

    A good note taking app is more than just a digital notepad. It helps you think. It keeps your ideas safe.

    It makes finding things simple. Let’s break down what makes an app truly great.

    Think about what you need. Do you write long essays? Do you sketch ideas?

    Do you just need quick reminders? The best apps fit your style. They don’t get in your way.

    They help you do your best work.

    Key Features to Look For

    • Syncing Across Devices: Your notes should be on your phone, tablet, and computer.
    • Easy Organization: Folders, tags, or notebooks help you sort notes.
    • Powerful Search: Finding old notes must be quick and accurate.
    • Rich Text Formatting: Bold, italics, lists, and headings make notes clearer.
    • Attachment Support: Add images, audio, or files to your notes.
    • Collaboration: Share notes with others if needed.
    • Security: Your notes should be kept private.

    These features work together. They make managing information simple. They save you time.

    They reduce stress. A cluttered mind leads to scattered thoughts. A good app brings order.

    My Personal Journey with Note Taking Chaos

    I remember a time when my desk was a battlefield of paper. Notebooks piled up. Receipts served as bookmarks.

    I had a half-finished novel idea on a napkin somewhere. I’d spend hours searching for a single phone number or appointment detail. It was pure frustration.

    One evening, I was trying to find notes for a client project. I knew I had them. Somewhere.

    I rummaged through three different notebooks and a drawer full of loose papers. My panic grew. The meeting was the next morning!

    I felt that familiar knot of anxiety tighten in my stomach. I was losing important information. I was losing precious time.

    That night, I vowed to find a better way. I started exploring digital options. Many felt clunky or too simple.

    Some were overly complicated. It took time and trial and error. I tried apps that were too basic.

    I tried ones that had too many features I didn’t need. It felt like Goldilocks searching for the perfect porridge. But eventually, I found tools that clicked.

    They transformed how I manage my ideas and work. It was a game-changer.

    Note Taking App Styles

    Digital Notebooks: Like a virtual binder for your thoughts. Think Evernote or OneNote.

    To-Do Lists Focused: Great for daily tasks and simple reminders. Examples include Todoist or Microsoft To Do.

    Mind Mapping Tools: For visualizing complex ideas. Apps like MindMeister are good here.

    Markdown Editors: For writers and coders who like plain text. Ulysses or Typora fit this.

    The Top Contenders: Which App is Best for You?

    Picking the right note taking app depends on your life. Are you a student? A busy professional?

    A creative soul? Let’s look at some top choices.

    We’ll consider apps that are popular and well-regarded. We’ll touch on what makes each one special. This helps you see which one might be your perfect match.

    It’s not about finding the single “best” app. It’s about finding the best app for you. Your unique needs matter most.

    Quick Scan: Top Apps at a Glance

    App Name Best For Key Strength Platform Support
    Evernote All-around organization, research Web clipper, robust search Web, iOS, Android, Desktop
    OneNote Freeform notes, students, digital artists Infinite canvas, drawing tools Web, iOS, Android, Desktop
    Notion All-in-one workspace, teams Databases, templates, customization Web, iOS, Android, Desktop
    Google Keep Quick notes, reminders, simplicity Speed, ease of use, Google integration Web, iOS, Android
    Apple Notes Apple users, basic needs Seamless integration, ease iOS, macOS
    Simplenote Writers, simplicity, speed Minimalist design, fast sync Web, iOS, Android, Desktop

    Evernote: The Long-Standing Champion

    Evernote has been around for a long time. It’s a powerful tool for capturing everything. Think of it as a digital filing cabinet.

    You can save notes, web pages, images, and even audio clips.

    Its web clipper is famous. It lets you save articles directly from the internet. This is great for research or saving recipes.

    The search function is also very strong. It can even search text within images.

    Pros:

    • Excellent web clipper.
    • Powerful search capabilities.
    • Works on almost every device.
    • Good for capturing a wide range of information.

    Cons:

    • Free version has limitations on uploads and syncing.
    • Can feel a bit complex for new users.
    • Some recent pricing changes caused user concern.

    Evernote is a solid choice if you need to gather lots of information from the web. It helps you keep it all in one place. It’s ideal for researchers, students, and anyone who does a lot of online reading.

    Microsoft OneNote: The Digital Whiteboard

    OneNote is Microsoft’s answer to digital note taking. It’s completely free. It offers a vast, open canvas.

    You can type, draw, or on the page. It feels like a real notebook.

    It’s organized into notebooks, sections, and pages. This structure works well for many people. Students love it for taking class notes.

    Artists can sketch ideas directly. It integrates nicely with other Microsoft products.

    Pros:

    • Completely free to use.
    • Flexible layout, like a real notebook.
    • Great drawing and handwriting tools.
    • Good for visual thinkers and students.
    • Syncs well across devices.

    Cons:

    • Search isn’t as powerful as Evernote’s.
    • Interface can feel a bit cluttered sometimes.
    • Less emphasis on web clipping.

    If you like to doodle, draw, or take notes in a freeform way, OneNote is fantastic. Its flexibility makes it a favorite for many. It’s a great option if you’re already in the Microsoft ecosystem.

    Contrast: OneNote vs. Evernote

    OneNote: Freeform, infinite canvas, drawing friendly. Think of a blank page you can fill with anything.

    Evernote: Structured note-taking, strong web clipping, excellent search. Think of a highly organized digital filing system.

    Notion: The All-in-One Workspace

    Notion is more than just a note taking app. It’s a workspace. You can create notes, databases, project trackers, wikis, and more.

    It’s highly customizable. People build entire personal or team systems within Notion.

    You use “blocks” to build pages. Blocks can be text, to-do lists, images, tables, or even embed other apps. It has many templates to get you started.

    This app has a learning curve. But the power it offers is immense.

    Pros:

    • Extremely powerful and versatile.
    • Great for teams and complex projects.
    • Build custom databases and workflows.
    • Generous free plan for personal use.
    • Growing community and many templates.

    Cons:

    • Can be overwhelming for beginners.
    • Slower sync speeds sometimes.
    • Offline access can be limited.
    • Web clipper is not as robust as Evernote’s.

    Notion is for people who want to go beyond simple notes. If you want to manage projects, build a personal wiki, or create a central hub for your life, Notion is hard to beat. It takes time to master, but it’s worth it for many.

    Google Keep: Simplicity and Speed

    Google Keep is all about speed and simplicity. It uses a card-based system. Notes look like colorful sticky notes.

    It’s perfect for quick reminders, shopping lists, or jotting down a fleeting thought.

    It integrates seamlessly with other Google services. You can set location-based reminders. It’s easy to use and accessible on almost any device.

    It doesn’t have the deep organizational features of Evernote or Notion.

    Pros:

    • Extremely fast and easy to use.
    • Great for quick notes and reminders.
    • Color-coding makes visual organization simple.
    • Integrates with Google Calendar and Assistant.
    • Completely free.

    Cons:

    • Limited organization options (no folders).
    • Not ideal for long-form writing or complex projects.
    • Search is basic.

    If you just need a simple way to capture quick thoughts, reminders, and to-dos, Google Keep is a winner. It’s the digital equivalent of a sticky note pad. It’s always there when you need it.

    Stacked Micro-Sections: Choosing Based on Need

    For Students: OneNote for lecture notes, Notion for study planners.

    For Professionals: Evernote for research, Notion for project management.

    For Creatives: OneNote for sketches, Simplenote for writing ideas.

    For Quick Reminders: Google Keep, Apple Notes.

    Apple Notes: The Seamless Apple Experience

    If you live in the Apple ecosystem, Apple Notes is a fantastic option. It’s built right into your iPhone, iPad, and Mac. It syncs instantly via iCloud.

    It has improved a lot over the years. You can create checklists, add sketches, scan documents, and format text. It’s simple, effective, and free for Apple users.

    Pros:

    • Perfectly integrated with Apple devices.
    • Very easy to use.
    • Supports checklists, sketches, and document scanning.
    • Good search within Apple devices.
    • Free with iCloud.

    Cons:

    • Limited to Apple devices.
    • Not as feature-rich as cross-platform apps.
    • Organization options are basic.

    For iPhone and Mac users, Apple Notes is often all you need. It’s always there, always synced. It’s incredibly convenient for everyday notes and reminders.

    You can’t beat the ease if you’re all-in on Apple.

    Simplenote: For the Minimalist Writer

    As the name suggests, Simplenote is all about simplicity. It’s designed for text-based notes. It’s fast, clean, and focuses on writing.

    It uses Markdown formatting, which writers love.

    It syncs very quickly across all devices. There are no fancy features. No rich formatting tools beyond Markdown.

    This is its strength. It lets you focus purely on your words.

    Pros:

    • Extremely fast and lightweight.
    • Beautifully minimalist interface.
    • Great for writers and those who prefer plain text.
    • Markdown support.
    • Free and cross-platform.

    Cons:

    • No support for images, attachments, or rich text.
    • Very limited organization (tags only).
    • Not suitable for complex information.

    If you find other apps too distracting, Simplenote is a breath of fresh air. It’s perfect for drafting blog posts, journaling, or making simple text lists. It removes clutter so you can think.

    Real-World Scenarios and Habits

    How do people actually use these apps? Let’s look at some common patterns. Understanding these can help you see where you fit in.

    Many students use OneNote or Evernote. They take lecture notes. They clip research papers.

    They organize study guides. Their habits are about academic success. They need to store a lot of information.

    Busy professionals often lean towards Notion or Evernote. They manage client calls. They track project tasks.

    They save meeting minutes. Their habits involve quick access and organization for work.

    Some people use multiple apps. They might use Google Keep for quick grocery lists. They might use Simplenote for a daily journal.

    They might use Notion for a complex personal finance tracker. This multi-app approach works for some.

    The design of an app matters. A clean interface is less distracting. A powerful search is a lifesaver.

    The ability to add images or links makes notes more useful. User behavior is often shaped by these design choices.

    Observational Flow: From Idea to Action

    1. Capture: A sudden idea strikes. Quickly open your app (e.g., Google Keep) and type it in.

    2. Organize: Later, review your notes. Move longer thoughts to a more structured app (e.g., Evernote).

    Tag them for easy finding.

    3. Develop: Use a richer tool (e.g., Notion or OneNote) to expand on the idea. Add details, links, or sketches.

    4. Execute: If it’s a task, add it to your to-do list or project board.

    What This Means for You

    Knowing about these apps helps you make a choice. It’s about finding the right tool for your tasks. Don’t feel pressured to use the most complex app.

    Simplicity can be very powerful.

    When is a note taking app normal? It’s normal when it helps you. It’s normal when it reduces stress.

    It’s normal when you can find what you need quickly. Most users find joy in these things.

    When should you worry? You should worry if the app makes things harder. If you spend more time searching than doing.

    If you lose your notes. If you feel overwhelmed by its features. That’s a sign it might not be the right fit.

    Simple checks can help. Try the free version first. Use it for a week with real notes.

    See if it fits your daily flow. Does it sync reliably? Is the search fast enough?

    These practical tests are important.

    Quick Tips for Better Note Taking

    No matter which app you choose, these tips can help:

    • Be Consistent: Try to use one or two apps regularly.
    • Use Tags or Folders: Develop a system that works for you.
    • Keep it Simple: Don’t over-organize. Focus on clarity.
    • Review Regularly: Look at your notes periodically.
    • Write Notes for Yourself: Imagine explaining it to someone else.
    • Use Your App’s Strengths: Leverage web clippers or drawing tools.

    These small habits make a big difference. They help you get the most out of your chosen tool. Good note taking is a skill.

    It gets better with practice.

    Frequently Asked Questions

    What is the best free note taking app?

    For many, Microsoft OneNote is the best free option. It offers a lot of features and a flexible canvas. Google Keep is excellent for quick notes.

    Apple Notes is great if you’re on Apple devices. Simplenote is perfect for pure text.

    Can I use a note taking app for my work projects?

    Yes, absolutely! Apps like Notion are built for project management. Evernote is also great for organizing research and meeting notes.

    Many professionals use these tools daily.

    How do I organize notes if I use many different apps?

    It can be tricky. Try to assign a primary purpose to each app. For example, one app for quick thoughts, another for deep work.

    Use consistent naming conventions and tags across apps if possible. Or consider consolidating to fewer apps.

    What is the difference between a note taking app and a task manager?

    A note taking app is for capturing and storing information. A task manager is for tracking actionable items and deadlines. Some apps, like Notion, blend both.

    But typically, notes are for ideas, and tasks are for doing.

    Are note taking apps secure?

    Most reputable apps use strong encryption. However, security depends on the app and your own practices. Always use a strong password for your account.

    Be mindful of what sensitive information you store.

    How can I switch from my current note taking method to an app?

    Start small. Pick one type of note (e.g., meeting minutes). Try to capture them in the new app for a week.

    See how it feels. Gradually add more types of notes. Most apps offer import options, but manual transfer can help you rethink your system.

    Conclusion: Your Ideas Deserve a Great Home

    Finding the best note taking app is a personal quest. It’s about matching a tool to your brain. Whether you need a simple list or a complex system, there’s an app for you.

    Experiment and find what makes your ideas flow freely.

  • Project Management Software Basics

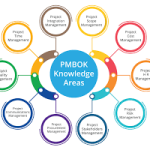
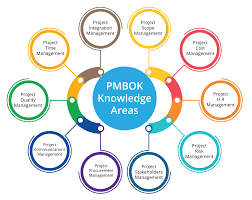
    Many people feel overwhelmed when they first hear about project management software. It seems like a big, complex tool. But what if it’s simpler than you think?

    This guide breaks down the basics. We’ll look at what it is and why it matters for your work. Get ready to feel more confident.

    Project management software is a tool that helps teams plan, track, and manage their work. It brings all project details together in one place. This makes tasks clearer. It also helps teams stay on schedule and budget. Basic understanding is key for success.

    What is Project Management Software?

    Think of project management software as a digital helper. It’s like a super-organized notebook for your entire team. This software helps you plan out what needs to be done.

    You can list all the tasks for a project. Then, you can assign these tasks to specific people. You can also set deadlines for each task.

    It’s not just about listing tasks, though. This software helps you see how all the pieces fit together. You can see the whole project at a glance.

    This is a big help for everyone involved. It makes sure no one is left guessing what to do next. It keeps the whole team moving forward together.

    The main goal is to make projects run smoother. It cuts down on confusion. It stops things from falling through the cracks.

    It also helps teams work better with each other. It’s a central hub for all project information. This is so much better than scattered emails and notes.

    Why is Project Management Software Important?

    Imagine trying to build a house without a blueprint. That’s what managing a complex project can feel like without the right tools. Project management software acts as that blueprint.

    It provides a clear plan and structure. This is vital for success.

    One big reason it’s important is that it improves communication. When tasks and updates are in one place, everyone knows what’s happening. This means fewer meetings just to share status.

    Less time is wasted searching for information. Everyone stays on the same page more easily. This saves valuable time and reduces stress.

    It also helps with accountability. When tasks are assigned and deadlines are set, people know what they are responsible for. This clarity helps ensure that work gets done.

    If a task is falling behind, it’s usually visible. This allows for early intervention. It stops small problems from becoming big ones.

    Another key benefit is better resource management. You can see who is working on what. You can also track how much time each task takes.

    This helps you understand your team’s capacity. It prevents overloading some people while others are idle. It makes sure your team’s effort is used wisely.

    Finally, it helps keep projects on track and within budget. By planning tasks, tracking progress, and monitoring resources, you can spot potential issues early. This allows you to make adjustments.

    You can avoid costly delays. It gives you more control over the project’s outcome. This leads to more successful projects overall.

    Key Features to Look For

    When you start looking at project management software, you’ll see many different options. They all have unique features. But some features are pretty standard.

    They are also very helpful for most teams.

    Task management is a must-have. This lets you create, assign, and track individual tasks. You should be able to add details like descriptions and checklists.

    Setting due dates is also part of this. It’s the core of any project plan.

    Project timelines are another important feature. These are often shown as Gantt charts. They give you a visual overview of your project.

    You can see how tasks connect. You can also see the project’s start and end dates. This helps you plan and manage dependencies.

    Collaboration tools are also key. Many software options have ways for team members to comment on tasks. They can also share files directly.

    This keeps all project-related conversations and documents in one spot. It’s much better than losing things in email threads.

    Reporting and analytics are also very useful. These features show you how your project is doing. You can see progress reports.

    You can track team performance. You can also see budget status. This data helps you make smart decisions.

    Some software also offers time tracking. This is useful for understanding how long tasks really take. It can help with billing clients.

    It also helps refine future project estimates. It gives you real data about your team’s time.

    Core Project Management Features

    • Task Creation & Assignment: Build and give out jobs.
    • Due Dates & Deadlines: Set clear timelines for tasks.
    • Progress Tracking: See how far along tasks are.
    • Team Collaboration: Allow comments and file sharing.
    • Visual Timelines: Use charts to see the project plan.
    • Reporting: Get summaries of project status.

    Types of Project Management Software

    Not all project management software is the same. They can be built for different needs. Understanding the types can help you pick the right one.

    Some are called task management tools. These are great for simpler projects. They focus heavily on creating and tracking tasks.

    They might not have all the bells and whistles of larger systems.

    Then there are full-featured project management suites. These are designed for complex projects. They offer a wide range of tools.

    Think Gantt charts, resource allocation, risk management, and detailed reporting. They are often used by larger teams or businesses.

    Some software uses specific methodologies. For example, Agile project management tools are popular. They often use boards with columns like “To Do,” “In Progress,” and “Done.” This style is common for software development.

    It helps teams adapt quickly.

    There are also collaboration platforms. While not strictly project management, they offer many similar features. They focus on team communication and file sharing.

    They can be a good starting point for smaller teams or less formal projects.

    Finally, some software is industry-specific. For example, there’s software made just for construction projects. Or for marketing campaigns.

    These tools often have features tailored to those unique needs.

    Choosing the Right Type

    Task Managers:

    Best for simple task lists and small teams. Easy to start.

    Agile Tools:

    Ideal for flexible work and quick changes. Uses visual boards.

    Full Suites:

    For complex projects needing detailed planning and tracking.

    How Does Project Management Software Work?

    At its heart, project management software organizes work. It takes the chaos of a project and brings order to it. Let’s break down the common workflow.

    It usually starts with planning. A project manager or team lead will define the project goals. They break down the overall project into smaller, manageable tasks.

    For each task, they might set a priority and a deadline.

    Then comes assignment. These tasks are assigned to team members. This is where everyone knows their role.

    They see what they need to do. They also know when it’s due.

    As work begins, progress tracking is vital. Team members update the status of their tasks. This could be marked as “In Progress,” “Blocked,” or “Completed.” This keeps everyone informed.

    It shows the overall project health.

    Collaboration happens throughout. Team members can communicate within the software. They can ask questions about tasks.

    They can share files needed to complete the work. This keeps discussions relevant to the task at hand.

    Monitoring is ongoing. Project managers use reports. They look at dashboards.

    They see if the project is on schedule. They check if it’s within budget. They can spot bottlenecks or delays early.

    Finally, there’s completion. Once all tasks are done, the project is closed. The software often allows for a review.

    This helps teams learn for next time. They can see what worked well and what didn’t.

    This cycle repeats for each project. The software provides the framework. It makes each step clearer and more efficient.

    It’s about structure and visibility for everyone.

    A Personal Experience with the Software

    I remember starting my first big project after joining a new company. It was a marketing campaign for a new product. My manager handed me a thick binder of notes.

    Emails were flying everywhere. We had spreadsheets for everything. It was a mess.

    My first week was spent just trying to figure out who was doing what. I’d ask someone about a task, and they’d say, “Oh, that’s handled by Sarah in accounting.” But Sarah had no clue I was even asking. I felt like I was drowning in information and still knew nothing concrete.

    Then, the company decided to implement a new project management tool. I was skeptical at first. Another new system to learn?

    But as we started putting the campaign into it, things changed. We created tasks like “Design ad creative,” “Write website copy,” and “Plan social media posts.”

    I could see my own tasks clearly. I could also see how my work fit with others. When I finished the ad creative, I updated my task.

    The social media manager saw it immediately. She could then start planning her posts around the images. It felt so much more connected.

    We had a small hiccup with a vendor. The task for that was marked “Blocked.” I could see it instantly. I could then follow up with the vendor directly through the software’s comment system.

    It was so much faster than waiting for an email reply. The relief of having this clarity was immense. It turned a stressful situation into a manageable one.

    Real-World Contexts and Scenarios

    Project management software is used in so many different settings. It’s not just for big tech companies. Let’s look at where you might see it in action.

    Construction: Imagine building a new office complex. There are hundreds of tasks. From pouring the foundation to installing the last light fixture.

    Software helps coordinate all these steps. It ensures concrete is poured before walls go up. It tracks material deliveries.

    It manages subcontractor schedules. This prevents costly delays.

    Marketing Campaigns: A team launching a new product needs to coordinate many efforts. They might have designers creating ads, writers drafting content, and social media managers planning posts. Software helps them all work together.

    It ensures deadlines are met for each stage of the campaign launch.

    Software Development: Tech teams often use Agile methods. They work in short cycles called sprints. Project management tools help them manage the backlog of features.

    They track bugs. They monitor progress on each sprint. This helps them release software updates quickly and reliably.

    Event Planning: Planning a large conference involves many moving parts. Booking venues, arranging speakers, managing registrations, and coordinating catering. Software helps keep track of all these details.

    It ensures nothing is forgotten. It keeps the event on schedule and within budget.

    Small Business Operations: Even a small business can benefit. A bakery might use it to manage custom cake orders. Or a consulting firm to track client projects and billable hours.

    It brings structure to daily operations. It helps ensure customer satisfaction.

    The common thread is always the need to organize multiple steps. It’s about coordinating people and resources. It’s about achieving a specific goal within a set timeframe.

    Scenario Spotlight: Marketing Campaign

    Phase 1: Planning

    Define campaign goals. Create tasks for market research. Set deadlines for strategy outlines.

    Phase 2: Creation

    Assign tasks for ad design, video production, and blog post writing. Track progress daily.

    Phase 3: Launch

    Schedule social media posts. Monitor initial campaign performance. Assign follow-up tasks.

    What This Means for You

    Understanding project management software isn’t just for managers. It’s for everyone on a team. Knowing the basics empowers you.

    It helps you contribute more effectively.

    When it’s normal to use: Most teams that have more than a few tasks to juggle will benefit. If your work involves collaborating with others. If you have deadlines to meet.

    If you need to track progress. Then some form of this software is likely useful.

    When to maybe worry (or ask questions): If you feel lost about your tasks. If you often don’t know what others are doing. If projects seem to always run late or go over budget.

    These could be signs that your current methods aren’t working. Or that you need better tools.

    Simple checks: Ask yourself these questions. Can I easily see my tasks for the week? Do I know who is responsible for what?

    Is there a central place for project information and discussions? If the answer to any of these is “no,” it might be time to explore software options.

    The goal is not to add complexity. It’s to remove it. It’s about making work clearer.

    It’s about helping everyone succeed. Even a simple tool can make a big difference.

    Quick Scan: Is Software Right for Your Team?

    Feature
    Yes, I need this
    Maybe later

    Clear task assignments

    X

    Team communication about tasks

    X

    Visual project timeline

    X

    Detailed progress reports

    X

    Quick Tips and Best Practices

    Once you start using project management software, these tips can help you get the most out of it.

    Keep tasks small and focused. A task like “Build website” is too big. Break it down into “Design homepage,” “Code navigation bar,” “Write About Us page.” This makes them easier to manage and track.

    Be consistent with updates. If you finish a task, update its status right away. If you get stuck, mark it as “Blocked” and add a comment. This keeps the information current for everyone.

    Use comments for task-specific questions. Instead of sending a separate email, add your question to the task itself. This keeps all communication tied to the work. It’s easy for others to find the context.

    Don’t overcomplicate things. Start with the basic features. As your team gets more comfortable, you can explore advanced options. The goal is to simplify, not to add new burdens.

    Regularly review project status. Take time each day or week to look at the dashboards or reports. This helps you stay aware of progress. It lets you spot potential issues before they become major problems.

    Train your team. Make sure everyone understands how to use the software. Offer training sessions. Provide simple guides.

    This ensures everyone is on the same page.

    Customize as needed. Most software allows some customization. You can set up custom fields or workflows. Tailor the tool to your team’s specific needs.

    These simple habits can make a big difference. They help ensure the software truly supports your projects.

    Frequently Asked Questions

    What is the main benefit of project management software?

    The main benefit is improved organization and communication. It brings all project details into one place. This helps teams stay on track, meet deadlines, and collaborate better.

    Do I need project management software for small teams?

    It can still be very helpful for small teams. Even with just a few people, tasks can get missed. Software provides a clear structure for who does what and when.

    It prevents confusion.

    How much does project management software cost?

    Costs vary widely. Some have free basic plans for small teams. Others can cost tens or even hundreds of dollars per user per month for advanced features.

    Many offer free trials so you can test them.

    What’s the difference between a Gantt chart and a Kanban board?

    A Gantt chart shows tasks over time, like a timeline. It’s good for long-term planning. A Kanban board uses columns (like “To Do,” “Doing,” “Done”) to show workflow.

    It’s great for visualizing tasks in progress and adapting quickly.

    Can project management software help with remote teams?

    Yes, it’s incredibly useful for remote teams. It acts as a central hub for work. It ensures everyone can access project information.

    It keeps communication organized, regardless of location.

    What is “Agile” project management?

    Agile is a way of working that focuses on flexibility and quick responses to change. Project management tools that support Agile often use visual boards like Kanban. They help teams deliver work in short cycles.

    Conclusion

    Project management software is a powerful tool. It helps teams get organized. It makes communication easier.

    It keeps projects on track. By understanding the basics, you can choose the right tool. You can use it to make your work life simpler and more productive.

    Don’t let complexity hold you back. Start with the essentials.

  • Beginner Guide To Canva

    Canva is a free online design tool that lets you create graphics. It is user-friendly and offers many templates. You can make social media posts, presentations, posters, and more. It is great for beginners and people who need design help fast.

    What is Canva?

    Canva is an online platform. You use it to make all sorts of visual content. Think social media posts, posters, flyers, presentations, and even short videos.

    It’s like a digital playground for your ideas. You don’t need to be a pro designer to use it. That’s its biggest magic.

    It works through your web browser. You can also get an app for your phone or tablet. This means you can design almost anywhere.

    It’s super handy when inspiration strikes.

    How Does Canva Work?

    The main idea behind Canva is ease of use. It uses a drag-and-drop system. This means you click on an element, like a picture or text box.

    Then you move it where you want it. You can also resize things just by pulling on their corners. It feels very natural.

    Canva has a huge library of templates. These are pre-made designs. You can pick one that fits what you need.

    Then, you change the words, colors, and pictures to make it your own. It’s like having a head start on every project. This saves tons of time.

    My First Canva Creation: A Simple Flyer

    I remember the first time I tried Canva. I needed a flyer for a small community bake sale. I was honestly a bit nervous.

    The last time I tried to design something, I used complicated software. It took me hours and I still hated it. My friends told me to try Canva.

    I went to the Canva website. I searched for “flyer” and tons of options popped up. I picked one that looked cheerful.

    It already had spaces for the event name, date, and time. I just clicked on the text and typed my own words. Then, I found a cute cupcake image in their library.

    I dragged it into place. In maybe 15 minutes, I had a flyer I was actually proud of. It felt like a small miracle!

    It showed me how easy design could be.

    Canva’s Core Features for Beginners

    Templates: Ready-made designs for almost anything.

    Drag-and-Drop Editor: Easy to move and resize elements.

    Element Library: Access to photos, graphics, shapes, and more.

    Text Tools: Change fonts, sizes, colors, and add effects.

    Brand Kit (Paid): Store your logos, colors, and fonts.

    Understanding the Canva Interface

    When you first open Canva, it might look like a lot. But it’s pretty organized. The main page shows you different design types.

    You can search for what you need. On the left side of the editor, you’ll see options. These are for adding text, uploading your own photos, and finding elements.

    The central area is your design space. This is where you build your creation. On the top, you have tools to change colors, fonts, and arrange items.

    It’s designed to be intuitive. Most buttons tell you what they do. You can learn by clicking around.

    Choosing the Right Template

    Templates are your best friend in Canva. They give you a starting point. Think about your goal.

    Are you making an Instagram post? A business card? A birthday invite?

    Type that into the search bar.

    Canva shows you many options. Look for ones that have a layout you like. Colors and fonts can be changed later.

    Some templates might have a crown icon. These are for Canva Pro users, which you pay for. But there are tons of free ones too.

    Pick one that feels close to your vision.

    Quick Scan: Template Types

    Use Case Canva Template Examples
    Social Media Instagram Post, Facebook Cover, Pinterest Pin
    Marketing Flyer, Poster, Business Card, Brochure
    Presentations Slide Deck, Whiteboard
    Personal Birthday Card, Invitation, Resume

    Adding and Editing Text

    Once you have a template, you’ll want to add your words. Click on any text box in the template. You can then type your message.

    To change the font, highlight the text. Then look at the top toolbar. You’ll see a dropdown menu for fonts.

    Canva has thousands of free fonts to choose from.

    You can change the size of the text the same way. There are also buttons for bold, italics, and alignment. You can even add effects to your text.

    This might be a shadow or an outline. Don’t go too wild with effects, though. Keep it clean and easy to read.

    Working with Images and Graphics

    Canva has a massive library of photos and graphics. On the left menu, click “Elements.” Here you can search for almost anything. Type in “cupcake,” “beach,” or “office.” You’ll see images, stickers, and illustrations.

    Some are free, and some are for Pro users.

    To add an image, just click it. It will appear on your design. You can then drag it around.

    Use the circles in the corners to make it bigger or smaller. If you upload your own photos, click “Uploads” on the left. Then click “Upload files.” You can drag your uploaded images onto your design too.

    Color and Backgrounds

    Changing colors is easy. Select an element (like text or a shape). Look at the top toolbar.

    You’ll see a colored square. Click it to open the color palette. You can choose from preset colors.

    You can also enter a specific color code if you know it. This is great for matching brand colors.

    To change the background, click on the background itself. Then use the color square in the toolbar. You can also choose from patterns or upload your own background image.

    Keep your color choices simple. Too many colors can make a design look messy. Think about what colors go well together.

    Contrast Matrix: Normal vs. Concerning Design Choices

    Normal

    Readability: Clear font, good contrast between text and background.

    Colors: Limited palette, colors complement each other.

    Elements: Clean layout, not too cluttered.

    Concerning

    Readability: Hard-to-read font, text blends into background.

    Colors: Too many clashing colors, jarring.

    Elements: Overcrowded, confusing message.

    Adding Your Own Branding (Logos and Fonts)

    If you have a logo, you can upload it. Click “Uploads” on the left. Then drag your logo file into the upload area.

    Once it’s uploaded, click on it. It will appear on your design. You can resize it and move it.

    Place your logo where it’s visible but not overpowering.

    If you have specific brand fonts, you can use them too. If you have Canva Pro, you can add them to your Brand Kit. For free users, you can upload individual font files.

    Just go to Uploads and find the font option. It’s important to be consistent with your branding.

    Organizing Your Design Elements

    As your design grows, it can get busy. Canva helps you organize. You can group elements together.

    Select multiple items by holding Shift and clicking them. Then click the “Group” button at the top. Now they move as one unit.

    You can also change the order of elements. Sometimes one element sits on top of another. Select the element.

    Then click “Position” at the top. You can send it backward or bring it forward. This helps layer things correctly.

    Designing for Different Platforms

    Canva makes it easy to design for different places. When you start a new design, choose the right size. Canva has presets for Instagram posts, Facebook covers, YouTube thumbnails, and more.

    These are already the correct dimensions.

    If you start with a template, you can also resize it. Look for the “Resize” button. You might need Canva Pro for this.

    But it’s handy for taking a poster design and making it fit a social media post. Just make sure to check how things look after resizing. Sometimes elements need minor adjustments.

    Observational Flow: Creating an Instagram Story

    1. Start New Design: Search “Instagram Story” and pick a template.
    2. Add Background: Use a solid color or a photo from Elements.
    3. Place Text: Type your message. Choose a clear font.
    4. Add Graphics: Use stickers or illustrations from Elements.
    5. Upload Logo: Add your brand logo if needed.
    6. Animate (Optional): Use simple text or element animations.
    7. Review: Check if it’s eye-catching and easy to read.
    8. Download: Save as PNG or JPG.

    Downloading Your Designs

    Once your design is ready, you need to download it. Click the “Share” button in the top right. Then click “Download.” You’ll see different file types.

    For most graphics, JPG is good. For images with transparent backgrounds or higher quality, PNG is better. For prints, PDF is often best.

    Canva offers different quality options. If you’re printing, choose the highest quality. For web use, a smaller file size is often fine.

    Make sure you download the right file type for where you’ll use it. This step is simple but very important.

    Canva Pro vs. Free: What’s the Difference?

    Canva has a free version that is very capable. It gives you access to many templates, photos, and elements. It’s perfect for beginners and casual users.

    The paid version, Canva Pro, offers more.

    Pro includes more premium templates and photos. It has a background remover tool. You can also resize designs instantly.

    Plus, you get more storage and advanced brand kit features. For most people starting out, the free version is more than enough. You can always upgrade later if you need more.

    Tips for Making Your Designs Look More Professional

    Even with simple tools, you can make great designs. First, keep it simple. Don’t try to cram too much in.

    White space is your friend. It makes designs easier on the eyes.

    Use consistent fonts. Stick to one or two font families. Also, use a limited color palette.

    Three to four colors usually works well. Pay attention to alignment. Make sure your text and images line up nicely.

    This gives a clean, organized look. Good alignment makes a big difference.

    Stacked Micro-Sections: Design Best Practices

    Font Choice: Use clear, easy-to-read fonts. Limit to two per design.

    Color Palette: Stick to 3-4 colors that work well together.

    Hierarchy: Make the most important text the biggest and boldest.

    Spacing: Give elements room to breathe. Avoid clutter.

    Consistency: Use the same fonts and colors throughout a project or brand.

    Real-World Scenarios: Using Canva

    Let’s look at some places you might use Canva. A small business owner might create social media graphics for their shop. They can make sale announcements or product highlights.

    They can use their brand colors and logo.

    A teacher could design a colorful worksheet for their students. They might use fun illustrations and clear headings. A student could create a presentation for a class project.

    They can make visually appealing slides instead of boring text ones. Even for personal use, like making a custom birthday card, Canva is perfect.

    What This Means for You

    If you’ve been wanting to make graphics but felt scared, Canva is for you. It lowers the barrier to entry for design. You don’t need expensive software or years of training.

    When it’s normal to use Canva? Anytime you need a visual. For school projects, personal events, or even starting a small online business.

    When should you worry? You shouldn’t worry about using Canva itself. It’s safe and easy.

    The only time to pause is if a design looks too busy or is hard to read. Then, simplify it.

    Quick Fixes and Tips

    Need to make text bigger? Select it and use the size buttons. Can’t find a specific graphic?

    Try different keywords in the search. Is your design too colorful? Reduce the number of colors used.

    Is it too plain? Add a graphic or a background texture.

    Always preview your download. Make sure everything looks as you expect. You can also use Canva’s collaboration features.

    Share your design with a friend to get feedback before publishing. This helps catch mistakes. It’s a simple way to improve your work.

    Frequently Asked Questions about Canva

    Is Canva really free to use?

    Yes, Canva has a very robust free version. You can create and download most designs with it. Some premium templates, photos, and features require a Canva Pro subscription, but the core functionality is free.

    Do I need to be a designer to use Canva?

    Absolutely not! Canva is designed for everyone. Its drag-and-drop interface and templates make it easy for people with no design experience to create great-looking graphics.

    What kind of designs can I make with Canva?

    You can make almost anything! Popular options include social media posts, flyers, posters, presentations, resumes, invitations, logos, infographics, and even simple videos.

    Can I use my own photos and logos in Canva?

    Yes, you can upload your own images, logos, and even fonts. Click on the “Uploads” tab on the left-hand side of the editor to add your files.

    How do I download my finished design?

    Click the “Share” button in the top right corner, then select “Download.” You can choose your file type (like JPG, PNG, or PDF) and quality settings.

    What is the difference between Canva Free and Canva Pro?

    Canva Pro offers more premium templates, stock photos, and advanced tools like a background remover and a magic resize feature. The free version is still very powerful for most everyday design needs.

    Final Thoughts on Getting Started with Canva

    Canva is a fantastic tool for anyone who needs to create visuals. It takes the complexity out of design. You can start making beautiful graphics today.

    Don’t be afraid to explore. Play around with the tools and templates. You’ll be surprised at what you can create!

  • Beginner Guide To Notion

    Notion is a flexible workspace app that combines notes, tasks, and databases. It helps users organize personal and work life by letting them create custom pages for various needs, like project management, writing, or habit tracking.

    What is Notion Really?

    Imagine a digital notebook that can do much more. That’s Notion in a nutshell. It’s an app designed to help you keep track of everything.

    Think of your to-do lists, your ideas, your meeting notes, and even your big life goals. Notion lets you put it all in one place. It’s not just a place to write things down, though.

    It’s a space where you can build your own systems for staying organized.

    The core idea behind Notion is that information is more useful when it’s connected and structured. It uses a system of “blocks.” These blocks can be text, to-do lists, images, tables, or even complex databases. You arrange these blocks on pages.

    These pages can be linked together, creating a web of information that works for you. It’s like having a digital Lego set for your thoughts and tasks.

    One of the main reasons Notion feels different is its flexibility. Unlike apps that have a set way of doing things, Notion lets you build your own. You can start with simple notes.

    Then, as you get more comfortable, you can create more advanced systems. This means Notion can grow with you. It can be a simple daily planner today and a full-blown project management tool tomorrow.

    My First Dive into Notion: A Real Story

    I remember when I first heard about Notion. Everyone was talking about how it could change how they worked. I was drowning in sticky notes and scattered documents.

    My computer desktop was a mess of random files. I thought, “This has to be the answer!” So, I downloaded it, full of hope. Then I opened it up, and… wow.

    It looked so… empty. And yet, so many buttons and options. It felt like standing in a giant, empty warehouse with a single box of building blocks.

    I didn’t know where to start. I clicked around. I tried to make a simple to-do list.

    It was okay, but it didn’t feel magical. I started getting frustrated. Was I just not smart enough for this?

    I almost gave up. I closed it and went back to my old, messy ways. But then, a few weeks later, a friend showed me their Notion setup.

    It was beautiful. It had their tasks, their reading list, and their meal plans all organized. That’s when I realized I was trying to build a castle without knowing how to lay a single brick.

    I decided to try again, but this time, I’d focus on learning the basics, one small step at a time.

    Getting Started: Your First Notion Page

    1. Create a New Page: Click the ‘+’ button on the sidebar.

    2. Add a Title: Give your page a clear name.

    3. Add Content: Type some text. Press Enter.

    Now try typing ‘/’. This brings up the block menu.

    4. Try a To-Do List: Type ‘/todo’ or select ‘To-do list’ from the menu. Check the box to complete a task.

    The Building Blocks of Notion

    Let’s talk about how Notion works. It’s all about “blocks.” Think of blocks as the fundamental pieces you use to build anything in Notion. They are like words in a sentence.

    You combine them to create meaning.

    The most common block is just plain text. You type words, and they appear. But you can change how that text looks.

    You can make it bold, italic, or underlined. You can also change its color or highlight it. This helps you emphasize important points right on the page.

    Then there are the functional blocks. These are the ones that give Notion its power. A “To-do list” block is a checkbox you can tick off.

    An “H1,” “H2,” or “H3” block is a heading to organize your content. You can also add bulleted lists and numbered lists. These make information easy to scan and digest.

    For example, a grocery list works well as a bulleted list.

    Here are some other popular blocks you’ll use:

    • Toggle List: This is great for hiding information until you need it. Click it to expand and see the details.
    • Quote: Use this to make important sayings or quotes stand out.
    • Divider: A simple line to separate sections of your page.
    • Callout: A special box with an icon, perfect for highlighting tips or notes.
    • You can upload images or paste links to online pictures.

    The real magic happens when you start combining these blocks. You can put a text block next to an image. You can make a whole section with headings, bullet points, and to-do lists.

    It’s all about arranging these pieces to create a page that makes sense for what you need it to do.

    Block Types at a Glance

    Basic Blocks

    Text: For writing content.

    Heading 1/2/3: To structure pages.

    Bulleted List: For lists of items.

    Numbered List: For ordered steps.

    Advanced Blocks

    To-do List: For tracking tasks.

    Toggle List: For collapsible content.

    Quote: To highlight specific text.

    Callout: For important notes.

    Pages within Pages: The Power of Nesting

    Notion pages are not just flat documents. They can contain other pages. This is a key concept.

    It means you can create a structure that mirrors how you think about your information. Think of it like folders on your computer, but much more visual and interactive.

    Let’s say you have a page for “Work Projects.” Inside that page, you can create new pages for each specific project. So, you’d have “Work Projects” as the main page. Then, you could have a sub-page called “Website Redesign.” Within “Website Redesign,” you could have even smaller pages for things like “Content Outline” or “Design Mockups.”

    This “nesting” is incredibly powerful for organization. It keeps related information together. It also prevents your sidebar from becoming a huge, unmanageable list.

    Instead, you have a clear hierarchy. You can easily navigate from your main project overview down to the smallest detail.

    To create a sub-page, you simply use the page block. When you create a new page, you can choose to embed it inside another page. Or, you can drag an existing page and drop it onto another page title in the sidebar.

    This makes it easy to rearrange your structure as your needs change.

    Building Your Structure

    Concept: Pages can contain other pages.

    Benefit: Creates clear organization and hierarchy.

    Example: Main Page -> Project Page -> Task List Page.

    How-to: Use the “Page” block or drag-and-drop in the sidebar.

    Databases: The Heartbeat of Notion

    While blocks are the building materials, databases are what make Notion truly stand out. If you’ve ever felt overwhelmed by managing lists of things, databases are your superpower in Notion. They go way beyond a simple spreadsheet.

    A Notion database is a collection of items, called “pages,” where each page has a specific set of properties. Think of a book collection. Each book is a page.

    The properties could be: “Title,” “Author,” “Genre,” “Read Status” (Yes/No), and “Rating” (1-5 stars).

    You can view these databases in different ways. The most common are:

    • Table View: This looks like a traditional spreadsheet. You see rows and columns. Each row is an item, and each column is a property.
    • Board View: This is like a Kanban board. It’s great for tasks or projects. You group items by a property (like “Status”) and see them in columns.
    • Gallery View: This shows your items as cards. It’s perfect for visual content like mood boards or portfolios.
    • List View: A simple, clean list of your items.
    • Calendar View: Ideal for deadlines and events.

    The real power is in the properties. You can have text properties, numbers, dates, select options (like “To Do,” “In Progress,” “Done”), multi-select options, checkboxes, and even relations to other databases. This allows you to link and categorize information in very sophisticated ways.

    For example, imagine a “Clients” database and a “Projects” database. You can create a “Relation” property in the “Projects” database that links to the “Clients” database. This means when you create a new project, you can easily select which client it belongs to.

    All the client’s information is then connected to that project page.

    Creating Your First Database

    It’s easier than you might think. Let’s set up a simple task list database.

    First, create a new page. Then, type ‘/’ and search for “Table.” Choose “Table – Inline” or “Table – Full page.” A full page is better when the database is your main focus. An inline table is good when it’s part of a larger page.

    You’ll see a table appear with a few default columns, usually “Name” and “Tags.” Let’s rename “Name” to “Task.” This will be where you type the name of your task.

    Now, let’s add more properties. Click the ‘+’ sign to the right of the “Tags” column header. A menu will pop up.

    Choose “Select” for a single choice property. Name this new property “Status.” You can then add options like “To Do,” “Doing,” and “Done.”

    Click ‘+’ again. This time, choose “Date.” Name it “Due Date.” This lets you set a deadline for each task.

    To add a new task, just click the ‘+’ button at the bottom of the table. A new row appears. Type your task, choose its status, and set a due date.

    Essential Database Properties

    • Text: For short descriptions.
    • Number: For quantities or values.
    • Date: For deadlines or events.
    • Select: For single-choice categories.
    • Multi-select: For multiple category choices.
    • Checkbox: For yes/no or done/not done.
    • URL: For website links.

    Views: Seeing Your Data Your Way

    Remember how we talked about different ways to view databases? This is where the real power comes out. You can have one database but look at it in many different ways, all at the same time.

    Each of these ways is called a “view.”

    Let’s go back to our task database. We have it as a “Table” view right now. This is good for seeing all your tasks and their details side-by-side.

    What if you want to see only the tasks you need to do today? Or what if you want to see tasks grouped by their status? That’s where other views come in.

    At the top of your database, you’ll see a “Layout” section with options like “Table,” “Board,” “Calendar,” etc. Click the “+” next to it to add a new view. Let’s add a “Board” view.

    You’ll be asked what to group by. Choose “Status.”

    Now, your tasks will appear as cards under “To Do,” “Doing,” and “Done” columns. You can drag and drop tasks between these columns to update their status. This is super visual and satisfying!

    Let’s add a “Calendar” view. Click “+” next to Layout and choose “Calendar.” If you set “Due Date” as the date property, your tasks will appear on the calendar. This is perfect for managing deadlines.

    Each view can be customized further. You can filter the view to show only certain tasks (e.g., tasks assigned to you). You can sort them (e.g., by due date).

    You can also choose which properties are visible in that view. This means one database can serve many different needs without becoming cluttered.

    Popular Database Views

    Table

    Spreadsheet-like view.

    Good for all data entry.

    Board

    Kanban style.

    Great for workflow stages.

    Calendar

    Date-based view.

    Ideal for schedules and deadlines.

    Gallery

    Card-based visual view.

    Use for portfolios or mood boards.

    Templates: Jumpstarting Your Workflow

    Notion offers a vast library of templates. These are pre-built pages and databases that you can use as a starting point. They cover almost anything you can imagine: project management, habit trackers, content calendars, meeting notes, personal wikis, and much more.

    Using templates saves you a lot of time and effort. Instead of building everything from scratch, you can pick a template that fits your need. Then, you can customize it to make it your own.

    This is a fantastic way for beginners to see how others use Notion effectively.

    When you create a new page, you’ll see an option to “Use template.” Click on it, and you’ll see categories. Browse through them. Found something you like?

    Click “Use template” and it will be added to your workspace.

    You can also create your own templates. If you build a page or a database that you want to reuse, you can save it as a template. This is great for recurring tasks or projects.

    For example, if you have a standard format for weekly reports, save it as a template. Then, each week, you just create a new report from that template.

    Popular Template Categories

    • Personal: Daily planners, habit trackers, goal setting.
    • Projects: Project management dashboards, task lists, roadmaps.
    • Work: Meeting notes, team wikis, CRM.
    • Education: Study notes, assignment trackers, course schedules.

    Linking Pages: Creating a Connected Workspace

    One of the most powerful features of Notion is its ability to link pages together. This is how you build a truly interconnected workspace. It’s like creating your own internal web of information.

    To link to another page, you use the “@” symbol. Type “@” and start typing the name of the page you want to link to. A list of matching pages will appear.

    Select the one you want.

    This creates a “mention” of that page. When you click on it, you’ll jump directly to that page. This is incredibly useful for cross-referencing information.

    For example, in your “Meeting Notes” page, you might be discussing a specific “Project.” You can type “@” and then the project name. This links your meeting notes directly to the project page. Later, when you’re on the project page, you can see all the meetings that discussed it.

    You can also link to specific blocks within a page using the “Copy Link” option for any block. This gives you a direct URL to that specific piece of content.

    Link Smartly

    Use ‘@’ to mention other pages.

    Benefit: Connect related information easily.

    Example: Link a meeting note to its project page.

    Advanced: Link directly to specific blocks.

    Collaboration Features: Working Together

    Notion is also great for teams. You can share pages and entire workspaces with others. This allows for real-time collaboration.

    When you share a page, you can give different people different levels of access. They can be “View Only,” “Can Comment,” or “Can Edit.” This ensures that everyone has the right permissions.

    When multiple people are editing a page at the same time, you’ll see their cursors with their names. This makes it clear who is working on what. Comments can also be left on pages or specific blocks, allowing for discussions without cluttering the main content.

    For teams, Notion can become a central hub for all their work. Project plans, team wikis, client information, and task management can all live in one shared space. This reduces confusion and keeps everyone on the same page (literally!).

    Personalizing Your Notion Workspace

    Notion allows for a lot of personalization. You can change the appearance of your pages to make them more visually appealing and easier to use.

    At the top of any page, you’ll see options to add an “icon” and a “cover image.” Icons can be emojis or custom uploads. They help you quickly identify pages in your sidebar. Cover images add a visual flair to the top of your page.

    You can also change the text size and the default font. You can choose between a clean, modern font or a serif font. This helps set the tone for your page.

    For databases, you can customize column widths, colors, and even the order of properties. The goal is to make your workspace feel like your own. It should be a place you enjoy being in.

    When is Notion a Good Fit for You?

    Notion is fantastic for anyone who feels like their information is scattered. If you’re juggling multiple projects, personal goals, or creative ideas, Notion can help bring order to the chaos.

    It’s great for:

    • Students: Organizing notes, assignments, and study schedules.
    • Freelancers: Managing clients, projects, and invoices.
    • Writers: Outlining books, drafting articles, keeping content calendars.
    • Teams: Project management, knowledge bases, team communication.
    • Anyone who loves to organize: Personal dashboards, goal tracking, habit building.

    However, it’s worth noting that Notion has a learning curve. If you prefer a very simple, rigid structure for your notes, Notion might feel like overkill. For some, a straightforward note-taking app or a simple to-do list app might be enough.

    But if you crave flexibility and the ability to build custom systems, Notion is hard to beat.

    What This Means for You

    Knowing the basics of blocks, pages, and databases means you can start building. You don’t need to aim for perfection right away. Start small.

    When it’s normal: It’s normal to feel a bit lost at first. It’s normal to spend time just clicking around. It’s normal to create a page and then realize you want to change its structure later.

    When to worry (or rather, when to seek help): If you’re spending hours trying to figure out one small thing and feel stuck, don’t beat yourself up. There are tons of tutorials online. But generally, if you’re just playing with blocks and pages, it’s all good.

    Simple checks: Are your pages easy to read? Can you find what you need quickly? Is your system helping you, or is it adding to your stress?

    If the answer is yes to the first two and no to the last, you’re on the right track!

    Quick Tips for Beginners

    Here are some simple things you can do right now to make Notion easier:

    • Start with one thing: Don’t try to build your entire life system on day one. Pick one area, like “Daily To-Dos” or “Notes for Work,” and focus there.
    • Use the slash command: Remember, typing ‘/’ is your shortcut to almost everything in Notion. It’s the fastest way to add blocks.
    • Explore templates: Don’t be afraid to use templates. They are excellent learning tools. See how they are built and adapt them.
    • Keep pages simple: For your first pages, use basic text blocks, headings, and to-do lists. Get comfortable with these before diving into complex databases.
    • Link pages early: As soon as you create a related page, link it. This builds your connected workspace as you go.
    • Don’t delete anything important right away: Notion has a trash bin. If you’re unsure, move things to a “Sandbox” page first rather than deleting them.

    Your Notion Toolkit

    Core Tools: Blocks, Pages, Databases.

    Navigation: Sidebar, @-mentions, Links.

    Efficiency: Templates, Slash Commands.

    Customization: Icons, Covers, Fonts.

    Frequently Asked Questions About Notion

    Is Notion free?

    Yes, Notion offers a very generous free plan for personal use. It includes unlimited blocks, pages, and file uploads. Teams have paid plans with more collaboration features.

    Do I need an internet connection to use Notion?

    Notion works best with an internet connection for syncing and collaboration. However, there is an offline mode for desktop apps, allowing you to access and edit your pages when you’re not online. Changes will sync once you reconnect.

    Can I use Notion on my phone?

    Absolutely! Notion has dedicated apps for iOS and Android. They offer a great experience for accessing and editing your pages on the go.

    Is Notion good for journaling?

    Yes, Notion is excellent for journaling! You can create a simple page for daily entries, or set up a database with properties like date, mood, and tags for more structured journaling. Many people use templates specifically designed for this purpose.

    How do I organize my Notion sidebar?

    You can drag and drop pages to reorder them. Create “Parent” pages to group related “Child” pages. Use icons to make pages visually distinct.

    You can also collapse sections of your sidebar to keep it tidy.

    Can I import data into Notion?

    Yes, Notion allows you to import data from many popular services like Evernote, Trello, Asana, and Google Docs. You can also import files like CSVs or Markdown.

    Wrapping Up: Your Notion Journey Begins

    You’ve taken a big step today by learning about Notion’s core features. Remember, the best way to learn is by doing. Don’t be afraid to experiment and make mistakes.

    Your Notion workspace will evolve with you. Start simple, build gradually, and enjoy the process of creating a digital space that truly works for you.

  • Beginner Guide To Microsoft Excel

    Learning to use Microsoft Excel can feel a bit daunting at first. You see those rows and columns and wonder where to even begin. It’s like looking at a blank canvas.

    But once you get the hang of it, Excel becomes a super powerful tool. It helps you organize information, do quick math, and even make pretty charts. Think of it as your digital assistant for anything with numbers or lists.

    We’ll walk through the essentials, step-by-step.

    Microsoft Excel is a spreadsheet program that organizes data into rows and columns. It’s used for calculations, data analysis, and creating charts. This guide covers basic Excel skills for beginners, including data entry, formatting, simple formulas, and essential functions.

    What is Microsoft Excel and Why Should You Care?

    Microsoft Excel is a program that comes with Microsoft Office. Its main job is to handle data. You see it used everywhere.

    Businesses use it to track sales. Students use it for homework projects. Even people at home use it for budgets.

    It looks like a giant grid, made of cells. Each cell can hold text, numbers, or formulas. This grid system makes it easy to see and work with lots of information at once.

    It’s a tool that can save you tons of time and effort. It helps you avoid mistakes too, especially with math.

    Why should you care? Because knowing Excel opens doors. Many jobs require it.

    Even simple tasks at home get easier. Imagine tracking your monthly bills and seeing exactly where your money goes. Or planning a party and keeping track of guests and costs.

    Excel makes these things simple. It turns messy lists into clear pictures of your data. You can find patterns you never saw before.

    And it’s not as hard as it looks. We are going to break it down into easy parts.

    Getting Started: Your First Steps in Excel

    When you open Excel, you see a blank workbook. A workbook is like a binder. Inside, you have sheets, like pages.

    By default, you get one sheet called “Sheet1.” You can add more sheets by clicking the little plus (+) button at the bottom. Each sheet is a grid of rows and columns. Rows run across, from left to right.

    They are numbered (1, 2, 3.). Columns go up and down. They have letters (A, B, C.).

    Where rows and columns meet, you get a cell. The first cell is A1. The cell next to it is B1.

    The one below A1 is A2. Each cell has an address. This address is important.

    It’s how you tell Excel which data you want to use. You can type text into a cell. This could be a name, a label, or a title.

    You can also type numbers. These could be quantities, prices, or dates.

    Your First Excel Actions

    1. Open Excel: Find the Excel icon and click it.

    2. New Workbook: Choose “Blank workbook.”

    3. Select a Cell: Click on cell A1. You’ll see it highlighted.

    4. Type Text: Type “Item” in A1. Press Enter.

    The cursor moves to A2.

    5. Type a Number: Type “10” in A2. Press Enter.

    6. Move Around: Use the arrow keys on your keyboard to move between cells.

    See? You’ve already done basic actions. You opened the program, typed text, typed a number, and moved around.

    It’s that simple to start. Don’t worry about fancy buttons yet. Just focus on getting data into the cells.

    This is the foundation of everything else you’ll do.

    Entering and Editing Data Like a Pro (Almost!)

    Typing data is easy. You just click a cell and start typing. What happens if you make a mistake?

    Or if you need to change something later? That’s where editing comes in. You can click on a cell to select it.

    Then, you can just type new text or numbers. This will replace whatever was there before. It’s like starting over for that one cell.

    Sometimes, you might want to change just a part of what’s in a cell. You can double-click the cell. This puts you into “edit mode.” You’ll see a blinking cursor.

    Now you can move around inside the cell’s text. You can add, delete, or change letters and numbers. This is handy when you only need to tweak a little bit.

    It’s much faster than retyping the whole thing.

    Another way to edit is using the “Formula Bar.” This bar is usually right above the column letters. It shows what’s inside the currently selected cell. You can click directly in the Formula Bar to edit the content.

    Some people find this easier, especially for long text. It gives you a bigger space to work in. Remember, pressing Enter usually finishes your edit and moves you to the next cell.

    Pressing Tab moves you to the right.

    Quick Data Editing Tips

    To Replace All: Select cell, type new content, press Enter.

    To Edit Part: Double-click cell OR click in Formula Bar, edit, press Enter.

    Undo Mistakes: Use the Undo button (curved arrow) at the top left. Or press Ctrl+Z (Windows) / Cmd+Z (Mac).

    Don’t be afraid to make errors. Everyone does when they are learning. The Undo button is your best friend.

    It lets you step back and try again. This reduces the stress of making a mistake. Just keep practicing typing and editing.

    The more you do it, the more natural it feels. You’ll start to remember which method works best for you.

    Making Your Data Look Good: Formatting Basics

    Once your data is in Excel, you want it to be easy to read. This is where formatting comes in. Formatting changes how your data looks.

    It doesn’t change the actual numbers or text, just their appearance. Think of it like putting a nice frame around a picture. Common formatting options include changing font style, size, color, and making text bold or italic.

    To format cells, you first select them. You can click and drag your mouse to select a range of cells. Or you can click one cell and then click another while holding the Ctrl key to select non-adjacent cells.

    Once selected, look at the “Home” tab in the ribbon at the top. You’ll see a “Font” group and a “Alignment” group. These have many options.

    For numbers, formatting is super important. You can tell Excel to show numbers as currency (like $10.50), percentages (like 50%), or dates (like 01/01/2024). This makes your data instantly understandable.

    To do this, select the cells with numbers. Then, in the “Home” tab, look for the “Number” group. There’s a dropdown menu with common formats.

    You can also click the little arrow in the corner of the “Number” group for more advanced options.

    Common Formatting Tools

    Bold, Italic, Underline: Found in the Font group. Make text stand out.

    Font Size/Type: Change how your text looks and its size. Easier to read.

    Text Color: Choose colors to highlight or match a theme.

    Fill Color: Color the background of a cell. Good for headings or important data.

    Alignment: Center text, align left or right. Makes grids look neat.

    Number Formats: Currency, Percentage, Date, etc. Makes numbers clear.

    Don’t go overboard with formatting. Too many colors or fonts can make a spreadsheet look messy. The goal is clarity.

    Use formatting to help people understand your data faster. Bold headings are a good start. Consistent number formats are key.

    Borders can help separate different sections of your data. Think about what makes sense for the information you are showing.

    The Magic of Formulas: Doing Math in Excel

    This is where Excel really shines. You can use formulas to do calculations. This is way faster and more accurate than doing it by hand.

    Every formula in Excel starts with an equals sign (=). This tells Excel, “Hey, I want you to calculate something here.” After the equals sign, you tell Excel what to do. You can use numbers directly, but it’s better to use cell addresses.

    Let’s say you want to add up numbers in cells A1 and A2. You would go to a new cell, like A3, and type `=A1+A2`. Press Enter.

    Excel will show you the sum of the numbers in A1 and A2. If you change the number in A1 or A2 later, the answer in A3 will automatically update. That’s the real power of formulas!

    They are dynamic.

    Excel has built-in formulas for common tasks. These are called “functions.” Some common ones are:

    • SUM: Adds up a range of numbers.
    • AVERAGE: Calculates the average of numbers.
    • COUNT: Counts how many cells have numbers.
    • MAX: Finds the largest number in a list.
    • MIN: Finds the smallest number in a list.

    To use a function, you type `=FUNCTIONNAME(cells)`. For example, to add up numbers in cells A1 through A10, you would type `=SUM(A1:A10)`. The colon (:) means “through”.

    So A1:A10 means all cells from A1 to A10.

    Using Formulas

    Start with =: Always begin a formula with an equals sign.

    Use Cell Addresses: Instead of numbers, use cell names (like B2, C5). This makes formulas update automatically.

    Basic Operators: Use + for addition, – for subtraction, * for multiplication, / for division.

    Built-in Functions: Excel has many helpful functions like SUM, AVERAGE, COUNT.

    Function Syntax: It looks like =FunctionName(argument1, argument2). Arguments are usually cell ranges.

    Learning formulas takes a little practice. Start with simple addition. Then try subtraction.

    As you get more comfortable, explore functions like SUM and AVERAGE. You’ll find that once you start using them, you’ll wonder how you ever managed without them. They make complex calculations so simple.

    It’s like having a calculator built right into your data.

    Working with Multiple Sheets: Organizing Your Data

    As you work with more data, you might need to break it up. This is where multiple sheets come in handy. Imagine you’re planning a big event.

    You might have one sheet for guest lists, another for the budget, and a third for vendor contacts. This keeps everything tidy and easy to find.

    To add a new sheet, click the plus icon (+) next to your last sheet tab at the bottom of the screen. You can rename sheets by double-clicking on their tab name (like “Sheet1”). You can change the tab color too, which helps visually organize things.

    Right-click the tab and choose “Tab Color.”

    Sometimes, you need data from one sheet to appear on another. You can do this using formulas that reference other sheets. If you want to pull the total from Sheet1 into Sheet2, you would go to Sheet2 and in a cell type `=SUM(Sheet1!A1:A10)`.

    The “!” tells Excel that the following range is on a different sheet. The name before the “!” is the sheet name.

    Managing Sheets

    Add Sheet: Click the ‘+’ button at the bottom.

    Rename Sheet: Double-click the sheet tab, then type new name.

    Delete Sheet: Right-click sheet tab, select “Delete.”

    Move/Copy Sheet: Right-click sheet tab, select “Move or Copy.” Drag tabs to reorder.

    Reference Other Sheets: Use `SheetName!CellRange` in your formulas.

    Using multiple sheets makes large projects manageable. It helps prevent your main sheet from becoming too crowded. Imagine trying to fit a guest list, menu, and seating chart all on one page!

    It would be a mess. By using separate sheets, you keep each part focused. This makes your entire workbook more professional and easier to use.

    My First Excel Mishap: The Case of the Missing Decimal

    I remember my very first project where I had to create a budget. I was so proud of myself for setting up all the columns: “Income,” “Rent,” “Groceries,” “Utilities,” “Savings,” and “Total Expenses.” I diligently typed in all the numbers. My rent was $1250.50.

    Groceries were $475.20. Utilities came to $180.75. I used the SUM function for my total expenses.

    Everything looked good.

    Then, I looked at my “Total Expenses.” It showed a number like $1906. I knew that wasn’t right. I double-checked my typing.

    Rent was $1250.50, not $1250. Groceries were $475.20, not $475. I felt a knot of panic in my stomach.

    I had entered the numbers so quickly, and I assumed Excel would just know. But it didn’t. I had forgotten to format the cells as currency or numbers with decimals.

    So, Excel was treating my numbers like whole numbers. It was adding 1250 + 475 + 180, and then just ignoring the cents. It was a frustrating moment.

    I had to go back and fix every single cell. Then, I learned the crucial lesson: formatting matters! It’s not just about making things pretty.

    It’s about telling Excel exactly what kind of data you’re working with. That mistake taught me to always format my numbers correctly from the start.

    Putting Data into Tables: A Game Changer

    One of the best features for beginners is turning a range of data into an Excel Table. It’s more than just drawing lines. When you format data as a table, Excel understands it’s a structured list.

    This unlocks special features that make managing your data much easier.

    To create a table, select your data range (including the headers). Go to the “Insert” tab and click “Table.” Excel will ask you to confirm the range and if your table has headers. Click “OK.” Instantly, your data looks different.

    The rows get alternating colors, and little dropdown arrows appear in the headers.

    These dropdown arrows are powerful. They let you sort your data (alphabetically or by number) and filter it. Filtering means showing only the data you want to see.

    For example, if you have a list of sales, you could filter to see only sales from last month. This is incredibly useful for finding specific information quickly. No more scrolling endlessly!

    Benefits of Using Excel Tables

    Easy Sorting & Filtering: Click the arrows in headers to sort or filter data.

    Automatic Formula Fill: When you add a new row, formulas in that column automatically extend.

    Clear Headers: Headers stay visible even when you scroll down a long list.

    Structured Data: Excel knows it’s a distinct list, enabling special features.

    Total Row Option: Easily add a row at the bottom for sums, averages, or counts.

    Using tables is a simple step that has a huge impact on how you use Excel. It takes your plain grid of data and turns it into something interactive and smart. I always tell beginners to use tables whenever they have a list of similar items, like customer names, product lists, or expense records.

    It’s a habit that pays off.

    What This Means for You: Making Excel Work for You

    So, what’s the takeaway from all this? Excel is a tool. And like any tool, it’s most useful when you know how to use it.

    For beginners, the most important thing is to not be afraid. Start small. Practice entering data.

    Try out simple formulas like addition.

    When should you worry? You probably won’t break Excel by doing something wrong. The “Undo” button is very forgiving.

    The main thing is to be patient with yourself. Learning takes time. Don’t try to learn everything at once.

    Focus on one concept, like data entry or simple formulas, until it feels comfortable.

    Here are some simple checks you can do:

    • Can you enter text and numbers into cells?
    • Can you edit those cells if you make a mistake?
    • Can you use the SUM formula to add up a few numbers?
    • Can you change a cell’s format to show currency?

    If you can do these things, you’re well on your way. The more you practice these basic skills, the more confident you’ll become. You’ll start seeing new ways Excel can help you.

    Quick Tips for Easier Excel Use

    Here are a few handy tips that can make your Excel experience smoother:

    Beginner Excel Tips

    Use Keyboard Shortcuts: Learn a few like Ctrl+C (Copy), Ctrl+V (Paste), Ctrl+Z (Undo), Ctrl+S (Save). They save lots of time.

    Save Often: Get in the habit of hitting Ctrl+S regularly. Nothing is worse than losing your work.

    Understand Cell References: Learn the difference between relative (A1) and absolute ($A$1) references. This is key for copying formulas.

    Use the Fill Handle: That little square at the bottom right of a selected cell. Drag it down to copy a formula or sequence (like 1, 2, 3.).

    Name Your Sheets Clearly: Don’t stick with “Sheet1,” “Sheet2.” Give them meaningful names like “Budget,” “Contacts,” “Sales Data.”

    These small tips can make a big difference in your daily use of Excel. They are like little helpers that make the program feel more intuitive. Once you start using them, you’ll wonder how you managed without them.

    They are part of building good habits in Excel.

    Frequently Asked Questions About Excel Basics

    What is the difference between a workbook and a worksheet in Excel?

    A workbook is the entire Excel file, like a binder. A worksheet (or sheet) is like a single page within that workbook. You can have many worksheets inside one workbook.

    How do I select multiple cells at once?

    Click and drag your mouse over the cells you want to select. For non-adjacent cells, click the first cell, then hold down the Ctrl key (or Cmd on Mac) and click the other cells you want.

    What does it mean to “format” cells in Excel?

    Formatting changes the appearance of the data in cells. This includes font style, size, color, text alignment, and how numbers are displayed (like currency or dates). It does not change the actual value of the data.

    Can Excel do more than just add and subtract?

    Yes, absolutely! Excel has hundreds of built-in functions for all sorts of calculations. These include things like calculating averages, finding the highest or lowest values, doing complex math, and even working with text and dates.

    Is it hard to copy formulas to other cells?

    No, copying formulas is quite easy! You can drag the fill handle (the small square at the bottom right of the selected cell) down or across. Excel automatically adjusts the cell references for you.

    How can I make my spreadsheet look more professional?

    Use formatting consistently. Bold headings, align text neatly, and use number formats like currency or percentages. Turning your data into an Excel Table also makes it look much more organized and professional.

    Conclusion: Your Excel Journey Has Begun

    You’ve taken the first steps into the world of Microsoft Excel. You’ve learned about cells, data entry, basic formatting, and the power of formulas. Remember, practice is key.

    Each time you use Excel, you’ll get a little better. Don’t be afraid to experiment. The goal is to make your life easier, not harder.

  • How To Use Google Docs

    Google Docs is a free, web-based word processor offered by Google. It lets you create and edit documents online. You can also collaborate with others in real time. It works on most devices with internet access.

    What Is Google Docs?

    Google Docs is a very popular tool. It helps you write things down. Think of it like a digital notebook or a word processor.

    But it has some cool extra features. It’s part of Google’s free suite of apps. This includes things like Gmail and Google Drive.

    The main idea is simple. You write your text. You can change how it looks.

    You can save it. You can share it. It all happens in your web browser.

    This means you don’t need to install special software. Your work is saved automatically. This is a big relief for many.

    So, what can you do with it? You can write reports. You can draft emails.

    You can create simple lists. You can even make study guides. The possibilities are quite wide.

    It’s designed to be easy for most people to pick up.

    A Personal Story: My First Google Docs Mishap

    I remember when I first started using Google Docs seriously. I was working on a group project in college. We had a big presentation due.

    Everyone was supposed to contribute their part to one document. I thought, “Easy enough!” I opened up the document and started typing away. I was so focused on my section.

    I didn’t notice the little colored cursors moving around the page. Suddenly, a whole paragraph I had just written vanished!

    My heart sank. Panic set in. I quickly checked my keyboard.

    Was I in the wrong mode? Did I hit a weird shortcut? Then I saw it.

    Another student had accidentally deleted my text while trying to edit their own part. I felt a mix of annoyance and pure confusion. How could this happen?

    I had spent time writing that. In that moment, I truly understood the power and the potential pitfall of real-time collaboration.

    It took me a minute to calm down. I remembered seeing an “Undo” button somewhere. Thankfully, I was able to bring my text back.

    That experience taught me a lot. It showed me the importance of clear communication within a group. It also made me appreciate the version history feature.

    I learned that while sharing is amazing, knowing how to protect your work is key. Now, I always make sure everyone on a team knows the basics before we dive in.

    Getting Started: Your First Document

    1. Open Google Docs: Go to docs.google.com. You need a Google account.

    2. Start Fresh: Click the colorful ‘+’ sign for a new blank document. Or, pick a template.

    3. Name It: Click “Untitled document” at the top left. Type a clear name.

    This helps you find it later.

    4. Just Start Typing: Click on the blank page. Your cursor will blink.

    Begin writing!

    The Basics of Writing and Editing

    Typing in Google Docs feels very much like a traditional word processor. You press keys, and letters appear. But there are some key differences and helpful tools.

    Let’s look at them.

    Typing and Correcting

    When you type, Google Docs often underlines words in red. This means it thinks there might be a spelling mistake. You can right-click on the red line.

    A menu will pop up. It will suggest corrections. You can choose the right one.

    Or, you can ignore it if you know it’s correct.

    Blue underlines often mean grammar suggestions. Right-click to see what it thinks you could improve. This is like having a little helper.

    It tries to make your writing clearer. It helps catch common errors.

    The Backspace key works as you expect. It erases letters to the left. The Delete key erases letters to the right.

    These are your main tools for fixing typos as you go.

    Basic Formatting: Making Text Look Good

    This is where you make your words stand out. You can change the look of text easily. First, you need to select the text.

    Click and drag your mouse over the words you want to change. Then, look at the toolbar at the top of the page.

    You’ll see buttons for different styles.

    • B (Bold): Makes text darker and thicker. Good for headings or important words.
    • I (Italic): Slants the text. Useful for titles or emphasis.
    • U (Underline): Adds a line under text. Use sparingly, as it can be hard to read.

    You can also change the font style. Next to the B, I, U buttons is a font name (like Arial). Click the arrow.

    A long list of fonts appears. Choose one you like. You can also change the size of the text here.

    Look for a number, like 10 or 12. Click the arrow to pick a different size.

    Color is another option. There’s a button that looks like a capital ‘A’ with a colored bar underneath. Click it.

    You can pick a new text color. This helps make parts of your document visually interesting.

    Paragraph Formatting

    Beyond individual words, you can format whole paragraphs. This affects spacing and alignment.

    • Alignment: Look for buttons that show lines aligned to the left, center, right, or justified. This controls where the text sits on the page. Left alignment is most common for normal text. Center is good for titles.
    • Line Spacing: Find a button with lines and up or down arrows. This lets you change the space between each line of text. More space can make reading easier.
    • Indentation: Buttons with left and right arrows help you move the whole paragraph away from the margin. This is useful for block quotes or lists.

    Quick Formatting Tips

    For Emphasis: Use bold sparingly. Too much bold makes it hard to read. Try italics for less important emphasis.

    Readability: Choose a simple font like Arial or Times New Roman. Size 11 or 12 is usually best for body text.

    Spacing is Key: Don’t cram text together. Use double spacing for drafts. Single spacing is fine for final versions, but add space between paragraphs.

    Working with Lists and Numbers

    Lists help organize information clearly. Google Docs makes creating them very simple.

    Bullet Points

    To start a bulleted list, click the bullet point icon on the toolbar. It looks like three dots with lines. Then, start typing.

    Each new line will automatically get a bullet. Press Enter to start a new bullet point. To end the list, press Enter twice.

    Or, click the bullet icon again to turn it off.

    Numbered Lists

    This works almost the same way. Click the numbered list icon on the toolbar. It looks like lines with numbers (1, 2, 3).

    Type your items. Each new line gets the next number. This is great for steps or ordered items.

    Like bullet lists, press Enter twice to finish.

    Sub-lists

    You can also create lists within lists. Start a main list. Then, on a new line, press the Tab key.

    This will indent your item and often change the bullet or number style. This creates a sub-list. Press Shift + Tab to move back out to the main list level.

    Inserting Objects and Elements

    Documents are more than just words. Google Docs lets you add other helpful things.

    Images

    To add a picture, go to the “Insert” menu. Choose “Image.” You have many options:

    • Upload from your computer.
    • Search the web directly from Docs.
    • Use your Google Drive files.
    • Use Google Photos.
    • Take a photo with your camera.
    • Enter a URL if the image is online elsewhere.

    Once you pick an image, it appears in your document. You can click on it to resize it. Drag the blue squares at the corners.

    You can also click and drag the image to move it. There are options for how text wraps around the image.

    Tables

    Tables are great for organizing data. Go to “Insert” then “Table.” A grid will appear. Move your mouse over it to choose how many rows and columns you want.

    Click when you have the right size.

    You can type into each cell. You can also format tables. Right-click inside a table for options.

    You can add or delete rows and columns. You can change cell background colors. Tables help present information in a structured way.

    Links

    To link to a website, highlight the text you want to be the link. Then, go to “Insert” and choose “Link.” A box will pop up. Paste the web address (URL) into the box.

    Click “Apply.” Now, when someone clicks that text, it will take them to that website.

    Special Characters and Symbols

    Need a degree symbol (°), an emoji (😊), or a mathematical symbol (√)? Go to “Insert,” then “Special characters.” A window opens. You can browse categories.

    Or, you can draw the symbol you’re looking for. Google Docs tries to find it. This is handy for specific needs.

    Document Elements at a Glance

    Element Where to Find It Why Use It
    Images Insert > Image Make documents visual, add examples
    Tables Insert > Table Organize data, compare items
    Links Insert > Link Connect to online resources
    Shapes Insert > Drawing > New Create diagrams, flowcharts
    Horizontal Line Insert > Horizontal line Break up sections visually

    Collaboration: Working with Others

    This is where Google Docs really shines. You can work on a document with other people at the same time.

    Sharing Your Document

    Look for the blue “Share” button in the top right corner. Click it. A box pops up.

    You can add people’s email addresses. You can choose what they can do: View, Comment, or Edit.

    • Viewer: They can only see the document.
    • Commenter: They can see and add comments.
    • Editor: They can make changes to the document itself.

    You can also get a shareable link. Click “Get link.” Then, choose “Anyone with the link.” Select the permission level (Viewer, Commenter, Editor). Copy the link.

    Send it to anyone you want to share with.

    Real-Time Editing

    When others are in the document, you’ll see their names or initials appear. They’ll have a colored cursor showing where they are typing. You can see changes happening live.

    This is great for teamwork. It’s also why my college project went sideways initially!

    Comments and Suggestions

    Instead of making direct edits, you can leave comments. Highlight some text. Click the “Add comment” icon (it looks like a speech bubble).

    Type your note. People can reply to comments. This keeps discussions separate from the main text.

    The “Suggesting” mode is also powerful. Click the pencil icon at the top right (near Share). Change it to “Suggesting.” Now, when you make changes, they appear as suggested edits.

    They have a different color. The owner of the document (or other editors) can then “Accept” or “Reject” these suggestions.

    Collaboration Etiquette

    Be Clear: If you’re suggesting edits, make sure it’s obvious. Use the Suggesting mode.

    Use Comments Wisely: Ask questions in comments. Point out areas that need discussion. Don’t make comments for things you can easily fix yourself.

    Communicate Outside Docs: For big project changes, talk to your team. Don’t rely solely on comments.

    Check Permissions: Make sure you’re sharing with the right people and giving them the right access.

    Advanced Features for Efficiency

    Once you’re comfortable with the basics, explore these tools. They can save you a lot of time.

    Version History

    This is my favorite feature after the mishap I told you about! Go to “File,” then “Version history,” then “See version history.” You’ll see a list of all the times your document was saved. You can go back to any previous version.

    You can even restore it. This is a lifesaver if something gets deleted or changed by accident. You can also see who made which changes.

    Templates

    Google Docs offers many pre-made templates. You can find them on the main Google Docs page (docs.google.com) under “Start a new document.” There are templates for resumes, letters, project proposals, meeting notes, and more. Using a template saves you time on formatting.

    Add-ons

    Google Docs has an “Add-ons” store. Go to “Extensions,” then “Add-ons,” then “Get add-ons.” You can find tools that add new features. Examples include advanced grammar checkers, citation tools, and diagram creators.

    Use them to expand what Docs can do for you.

    Voice Typing

    If you find typing tiring, try voice typing. Go to “Tools,” then “Voice typing.” A microphone icon will appear. Click it.

    Grant permission for your microphone. Speak clearly. Google Docs will type what you say.

    This can be much faster for some people. You can also use it to dictate notes.

    Find and Replace

    Need to change a word or phrase throughout your entire document? Use “Find and

    Smart Tools to Try

    Version History: Regularly check this to see changes and revert if needed. It’s your safety net.

    Templates: Don’t reinvent the wheel. Use templates for common document types.

    Voice Typing: Great for long documents or when your hands are busy. Speak clearly!

    Find and Replace: A real time-saver for editing and updating text.

    Organizing Your Document

    As documents get longer, organization becomes vital. Here’s how to keep things neat.

    Headings and Styles

    Using headings helps structure your document. On the toolbar, next to the font style, you’ll see “Normal text.” Click the arrow. You can choose “Title,” “Subtitle,” “Heading 1,” “Heading 2,” etc.

    These styles do more than just change the look. They create an outline. Go to “View,” then “Show document outline.” A panel will appear on the left.

    It lists all your headings. You can click on a heading to jump directly to that section. This is incredibly useful for long documents like reports or research papers.

    Page Breaks

    Sometimes you want a new section to start on a fresh page. Place your cursor where you want the new page to begin. Go to “Insert,” then “Break,” then “Page break.” Everything after that point will move to the next page.

    Bookmarks

    Bookmarks are like hidden links within your document. They help you mark specific spots. To add a bookmark, place your cursor where you want it.

    Go to “Insert,” then “Bookmark.” A blue marker will appear. You can then refer to it. It’s less common than headings but useful for specific internal notes.

    Google Docs on Different Devices

    One of the biggest advantages of Google Docs is its accessibility. You can use it on almost any device.

    Desktop and Laptop

    This is where most people start. You use the web browser (like Chrome, Firefox, Safari) to go to docs.google.com. This offers the full range of features.

    You’ll need a stable internet connection.

    Tablets and Smartphones

    Google provides free mobile apps for iOS and Android. Search for “Google Docs” in your device’s app store. Download it.

    You can open, edit, and create documents on the go. The interface is simpler due to screen size. But all the essential features are there.

    You can even use voice typing.

    Offline access is also possible. You need to set this up in the settings. This lets you work on documents even without internet.

    Changes will sync when you’re back online. This is a game-changer for commuters or people with spotty Wi-Fi.

    When Is Google Docs the Right Choice?

    Google Docs is fantastic for many things. But it’s not always the perfect tool for every single writing task.

    When it Shines

    • Collaboration: Any project involving more than one person.
    • Accessibility: Working from multiple devices or locations.
    • Free to Use: If you don’t want to pay for software.
    • Real-Time Updates: For documents that need to be current.
    • Simple Documents: Letters, basic reports, notes, outlines.

    When to Consider Alternatives

    • Complex Layouts: Highly designed brochures or magazines.
    • Offline-Heavy Work: If you are always without internet and need robust offline features.
    • Very Large Documents: Extremely long books or theses might perform better in desktop software.
    • Advanced Word Processing: Desktop programs often have more niche features for highly specialized writing.

    Common Questions About Using Google Docs

    What is the main benefit of Google Docs?

    Click to see answer

    The biggest benefit is its real-time collaboration feature. Multiple people can edit a document at the same time. It also offers free access, automatic saving, and accessibility from any device with internet.

    How do I save my work in Google Docs?

    Click to see answer

    Google Docs saves your work automatically as you type. You don’t need to manually save like in older software. Your changes are stored in Google Drive.

    Can I use Google Docs without an internet connection?

    Click to see answer

    Yes, you can enable offline access. You need to do this in the Google Docs settings when you have an internet connection. Then, you can edit documents without being online.

    How do I share a Google Doc with specific people?

    Click to see answer

    Click the “Share” button. Enter the email addresses of the people you want to share with. Choose their permission level (Viewer, Commenter, Editor).

    Then click “Send” or “Share.”

    What does the “Suggesting” mode do?

    Click to see answer

    In “Suggesting” mode, your edits appear as proposed changes. They don’t change the document directly. Other editors can then accept or reject your suggestions.

    This is great for reviewing work without altering the original text.

    How can I find older versions of my document?

    Click to see answer

    Go to “File,” then “Version history,” then “See version history.” You’ll see a timeline of all saved versions. You can view or restore any past version.

    Conclusion

    Mastering how to use Google Docs opens up a world of easier writing and teamwork. From simple text formatting to complex collaboration, it’s a versatile tool. Remember to use its sharing features wisely.

    Keep an eye on version history for safety. With a little practice, Google Docs will become an indispensable part of your digital toolkit.

  • Software Tutorials For Beginners

    Learning new software can feel like trying to read a secret code. You see all these buttons and menus. You wonder, “Where do I even start?” It’s a common feeling for many.

    But it doesn’t have to be so tough. We’re here to break it down. This guide will help you find and use software tutorials.

    You’ll learn to build your skills step by step.

    Software tutorials for beginners offer step-by-step guidance to learn new programs. They explain features simply, show how to perform tasks, and build user confidence. Finding the right tutorial makes a big difference in learning software easily.

    Understanding Software Tutorials for Beginners

    What exactly are software tutorials? Think of them as your friendly guides. They walk you through new computer programs.

    They break down complex steps into easy actions. These guides are made for people who are new to a certain software. They assume you don’t know much yet.

    That’s a good thing!

    The main goal is to make learning simple. Tutorials show you what to click. They tell you why you click it.

    They help you do what the software is designed to do. Without them, you might just guess. Or you might get stuck and give up.

    Good tutorials prevent that frustration. They build your knowledge steadily.

    Why are they so important? So many things we do now need software. From writing emails to editing photos, it all uses programs.

    Being able to use software well opens up many doors. It can help you in school, at work, or even with hobbies. Learning software gives you new tools.

    It makes tasks easier and faster. It can even help you create new things.

    In this guide, we will look at different kinds of tutorials. We will discuss how to find the best ones. We will talk about what makes a tutorial easy to follow.

    We will also share tips to help you learn faster. By the end, you will feel more confident. You will know how to approach learning any new software.

    Think about a time you felt lost with a new gadget. Maybe it was a new phone or a smart TV. You looked at the buttons.

    Nothing made sense at first. Software is often like that. But if you had a simple guide, it would be easier.

    Software tutorials are that guide. They make the complex simple. They turn confusion into understanding.

    They are your first step to mastering new digital tools. We aim to make this learning path smooth. We want you to feel ready and able.

    The Journey of Learning a New Program: My Own Stumble

    I remember when I first started using graphic design software. It was for a small project, just a few simple banners. I opened the program.

    My screen filled with so many tools and options. It looked like a cockpit. My stomach did a little flip.

    I felt a wave of panic. “How can I possibly learn all this?” I thought.

    I tried to just click around. I guessed what buttons did. I accidentally deleted a whole section of my work.

    I felt so frustrated. My simple project felt impossible. I almost gave up then and there.

    The cursor blinked on my screen, mocking me. The deadline loomed. I felt very small and overwhelmed.

    Then I remembered a friend telling me about tutorials. I searched online. I found a video.

    The person on screen was calm. They showed me one tool at a time. They explained what each one did.

    They showed me how to make a simple shape. Then how to add color. It was like a light turned on.

    I followed along. Slowly, my banner started to take shape. That feeling of accomplishment was huge.

    This experience taught me a lot. It showed me that struggle is normal. But it also showed me that help is out there.

    Tutorials are not a sign of weakness. They are a smart tool. They save you time and frustration.

    They build your confidence with each step. That first banner wasn’t perfect, but I made it. I learned just enough to finish my task.

    And I learned that I could learn this software.

    It’s these moments that shape our learning. The frustration before the breakthrough. The feeling of being lost, then finding a clear path.

    My story is one many beginners share. They face a wall of complexity. They feel their skills aren’t enough.

    But a well-made tutorial is like a ladder. It helps you climb over that wall, one rung at a time. It’s about finding the right support.

    The key was finding a tutorial that matched my level. Not too advanced, not too basic. It spoke my language.

    It showed me the first few steps clearly. It didn’t try to teach me everything at once. That’s the magic of good beginner tutorials.

    They respect your starting point. They guide you with care and patience. That’s the path we want to help you find today.

    Types of Beginner Tutorials

    Video Tutorials: Great for seeing actions. You watch someone do it. It’s like looking over their shoulder.

    Written Guides: Good for slow, careful learning. You can reread steps. They often have pictures.

    Interactive Tutorials: You click along within the software. It guides your hands directly.

    Webinars/Live Sessions: You can ask questions in real time. It feels more personal.

    What Makes a Software Tutorial “Good” for Beginners?

    Not all tutorials are created equal. Some are great. Others leave you more confused than before.

    What makes a tutorial truly helpful for someone just starting out? It boils down to a few key things. These make the difference between understanding and feeling lost.

    First, clarity is king. A good tutorial uses simple words. It avoids jargon and technical terms.

    If a term must be used, it’s explained right away. The sentences are short. The steps are clear and numbered.

    You should never have to reread a step multiple times just to understand it. The language should feel like a friend explaining something. Not like a textbook.

    Second, focus is vital. A beginner tutorial should focus on the essentials. It teaches you the core functions.

    It shows you how to complete basic tasks. It doesn’t try to cover every single feature of the software. That would be overwhelming.

    Think about learning to drive. You learn to start the car, steer, and brake. You don’t learn advanced racing techniques on day one.

    Beginner tutorials do the same for software.

    Third, visual aids help a lot. For video tutorials, clear screen recordings are essential. The cursor should be easy to follow.

    Zooming in on important buttons is helpful. For written guides, clear screenshots are a must. They show you exactly where to look and click.

    Seeing is often much easier than just reading instructions.

    Fourth, pacing matters. A good tutorial moves at a gentle pace. It gives you time to follow along.

    It doesn’t rush through steps. For videos, this might mean longer videos that cover fewer topics. For written guides, it means breaking down complex processes into many small steps.

    Slow and steady wins the race here.

    Finally, real-world examples make it relatable. When a tutorial shows you how to create something you might actually use, it clicks. For example, learning to use a word processor to write a letter is more useful than just learning about font types.

    Showing how to make a simple social media graphic is better than just learning about layers. This context makes the learning stick.

    So, when you look for a tutorial, keep these points in mind. Does it use simple language? Does it focus on what you need to know first?

    Does it show you clearly what to do? Does it go at a good pace? Does it give you a reason to learn this skill?

    These are the signs of a tutorial that will actually help you learn. They are the keys to unlocking your software skills without the usual pain.

    Signs of a GOOD Beginner Tutorial

    • Uses simple words.
    • Explains jargon.
    • Short sentences.
    • Focuses on basics.
    • Clear visuals (video/images).
    • Slow, steady pace.
    • Shows real examples.

    Where to Find the Best Software Tutorials for Beginners

    Now that we know what makes a tutorial good, where do we find them? The internet is full of them. But finding the right ones can take a little searching.

    Don’t worry, I’ve got some favorite spots. These places offer tons of helpful content for new users.

    Your first stop should often be the software’s official website. Many companies that make software want you to succeed. They create their own help sections.

    These often have guides and videos specifically for beginners. Look for links like “Support,” “Help,” “Learn,” or “Tutorials.” This is often the most accurate and up-to-date information.

    Next, YouTube is a goldmine. Seriously, if you can think of a software, someone has probably made a tutorial for it. Search for ” tutorial for beginners.” You’ll find channels run by experts, educators, and even other users.

    Pay attention to the view count and comments. Videos with lots of views and positive comments are usually good. Look for channels that focus on clear instruction.

    Online learning platforms are another great resource. Sites like Coursera, Udemy, Skillshare, and LinkedIn Learning offer courses on almost any software imaginable. Many of these are designed for beginners.

    They often have structured lesson plans. Some might cost money, but they can be very in-depth. You can often find free introductory courses too.

    Don’t forget tech blogs and websites. Many websites review software or offer tips. They sometimes include step-by-step guides.

    Search for ” guide” or ” how-to.” These can offer different perspectives than official sources. They might explain things in a more casual, relatable way.

    For specific software types, there might be dedicated communities. For example, if you’re learning web development software, sites like freeCodeCamp or Stack Overflow can be useful. For creative software, places like Adobe’s own tutorials or community forums are excellent.

    For general office software, Microsoft’s own training resources are quite good.

    When searching, use specific keywords. Instead of just “Photoshop tutorial,” try “Photoshop beginner photo editing tutorial” or “Photoshop introduction for absolute beginners.” This helps narrow down the results. Also, check the date of the tutorial.

    Newer tutorials are better for software that updates frequently.

    Finding tutorials is like finding the right tool. You might need to try a few before you find the one that fits your hand perfectly. Don’t get discouraged if the first one you find isn’t ideal.

    Keep looking! There’s a perfect tutorial out there for everyone. It just takes a little effort to find it.

    Top Places for Tutorials

    • Software Official Websites: Most accurate info.
    • YouTube: Huge variety, free videos.
    • Online Learning Platforms: Structured courses (Udemy, Skillshare).
    • Tech Blogs: Casual guides, helpful tips.
    • Community Forums: Niche software help.

    How to Use a Software Tutorial Effectively

    So you’ve found a great tutorial. That’s half the battle! But just watching or reading isn’t enough.

    To really learn, you need to use the tutorial actively. Think of it as a workout. You need to do the reps to get stronger.

    First, prepare your space. Make sure your computer is ready. Have the software installed and open.

    Try to minimize distractions. Put your phone on silent. Let others know you need quiet time.

    A focused environment helps you absorb more information.

    Next, follow along in real time. If it’s a video, pause it often. Do the step shown on your own computer.

    Then, play the next part. Don’t just watch passively. Your hands need to get used to the actions.

    This builds muscle memory. It helps you remember where things are and what they do.

    Third, take notes. Jot down key steps or shortcuts. Write down any new terms and their meanings.

    You can use a notebook or a digital note app. These notes become your personal cheat sheet. You can refer to them later when you forget something.

    They are a valuable record of your learning.

    Fourth, experiment safely. After following a step, try changing it a little. What happens if you use a different color?

    Or a different size? This is how you learn the nuances. Most beginner tutorials won’t break your software.

    Playing around helps solidify your understanding. You’ll discover things the tutorial didn’t cover.

    Fifth, practice what you learned. Once the tutorial is done, don’t stop. Try to do the task again from scratch.

    Without watching the tutorial. Use your notes. This tests your memory.

    It shows you where you still need work. Repeat the task a few times over a few days. Regular practice is key to making skills stick.

    Finally, don’t be afraid to rewind or rewatch. If you missed something, go back. If a concept is still fuzzy, watch that part again.

    It’s okay to need repetition. Everyone does! Good tutorials are there to be revisited.

    They are tools for ongoing learning, not just a one-time watch.

    Using tutorials effectively is a skill in itself. It’s about being an active learner. It’s about engaging with the material.

    It’s about practicing until it feels natural. By following these tips, you turn passive viewing into active learning. You build real skills, not just watch others.

    Effective Tutorial Use Checklist

    Before: Set up your space. Close distractions.

    During: Pause and follow along. Take notes. Experiment safely.

    After: Practice from memory. Repeat tasks. Rewatch if needed.

    Common Software for Beginners and Their Tutorials

    Many people start their software journey with common tools. These are programs many of us use daily. Knowing where to find tutorials for these can be a great starting point.

    Microsoft Office Suite (Word, Excel, PowerPoint): These are standard in many offices and schools. Microsoft provides extensive free training videos and guides on their website. YouTube also has countless tutorials covering everything from basic document formatting in Word to creating simple spreadsheets in Excel and making presentations in PowerPoint.

    Google Workspace (Docs, Sheets, Slides): Similar to Microsoft Office, Google offers free tutorials through its Google Workspace Learning Center. YouTube is again a fantastic resource. Many educators and small business owners share tips on using these cloud-based tools effectively for collaboration.

    Adobe Photoshop/Illustrator (for design): If you’re interested in graphic design or photo editing, Adobe’s own tutorials are excellent. They have a dedicated “Learn” section on their website. On YouTube, channels like Adobe Photoshop Tutorial and Envato Tuts+ offer many beginner-friendly lessons.

    These often focus on specific tasks like removing backgrounds or creating simple logos.

    Canva (for easy design): Canva is designed to be user-friendly. Their website has a comprehensive “Learn” section with templates and tutorials. YouTube is also full of guides on creating social media posts, flyers, and presentations using Canva’s drag-and-drop interface.

    Video Editing Software (e.g., DaVinci Resolve, iMovie, Clipchamp): For beginners, iMovie (for Apple users) and Clipchamp (built into Windows) are often recommended. Both have straightforward interfaces. Their respective company websites offer basic guides.

    DaVinci Resolve is more complex but has amazing free beginner tutorials on YouTube from channels like Casey Faris and Blackmagic Design itself.

    Coding (e.g., HTML, CSS, Python): Learning to code requires different types of tutorials. Websites like freeCodeCamp, Codecademy, and Khan Academy offer interactive courses. YouTube channels like Traversy Media and The Net Ninja are popular for visual learners.

    These often start with “What is coding?” and build up slowly.

    When looking for tutorials for these popular programs, always specify “beginner” in your search. This ensures you get content that won’t overwhelm you. Remember to check the version of the software the tutorial is for, as features can change.

    Popular Software & Tutorial Sources

    Software Beginner Focus Best Tutorial Sources
    Microsoft Office Basic docs, sheets, presentations Microsoft Learn, YouTube
    Google Workspace Docs, Sheets, Slides for collaboration Google Workspace Learning, YouTube
    Canva Simple graphic design Canva Learn, YouTube
    iMovie / Clipchamp Basic video editing Apple Support, Microsoft Support, YouTube
    HTML/CSS Web page basics freeCodeCamp, Codecademy, YouTube

    Troubleshooting Common Tutorial Issues

    Even the best tutorials can sometimes present challenges. You might run into a problem that the tutorial doesn’t cover. Or maybe the tutorial itself is confusing.

    Don’t let these small bumps derail you. Here’s how to handle them.

    Issue: The tutorial is too fast.
    What to do: Pause frequently. Use the playback speed controls if available on video platforms. You can often slow down videos to 0.75x or even 0.5x speed.

    For written tutorials, take breaks. Read one step at a time.

    Issue: I don’t understand a term.
    What to do: Pause and search for the term online. Or look for a glossary in the tutorial or software help section. Many tutorials also define terms as they use them.

    If not, a quick search should give you a simple explanation.

    Issue: The software looks different on my screen.
    What to do: Check the version of the software used in the tutorial. Software updates can change the look and feel. Try to find a tutorial for the version you are using.

    If that’s not possible, focus on the function the tutorial is showing. The button might look slightly different, but its purpose is likely the same.

    Issue: I made a mistake and can’t fix it.
    What to do: Most software has an “Undo” function (often Ctrl+Z or Cmd+Z). Use it! If Undo doesn’t work, you might need to close the file without saving and reopen it.

    Or, if it’s a small mistake, try to follow the tutorial’s steps again from that point. Sometimes, you just have to start that part over.

    Issue: The tutorial seems to skip a step.
    What to do: Go back and watch/read that section very carefully. Sometimes, a step is implied or combined with another. If it truly seems missing, try searching for another tutorial that covers that specific part.

    You can also ask in online forums for help.

    Issue: I’m feeling overwhelmed and frustrated.
    What to do: Take a break! Step away from the computer. Do something completely different for a while.

    Come back with fresh eyes. Remind yourself why you are learning this. Small wins build confidence.

    Celebrate finishing even a small part of the tutorial.

    Learning involves problem-solving. Tutorials are tools, but they aren’t magic wands. You are the one doing the learning.

    Facing small issues is normal. It’s how you respond to them that matters. Don’t give up.

    Troubleshoot. Ask for help. You’ll get there.

    Quick Fixes for Tutorial Glitches

    • Too Fast: Slow playback, pause often.
    • Jargon: Search terms, find glossaries.
    • Different Look: Check software version, focus on function.
    • Mistake: Use Undo (Ctrl+Z), retrace steps, or restart.
    • Skipped Step: Watch carefully, search for specific help.
    • Frustration: Take a break, come back fresh.

    Building Confidence: From Beginner to Beyond

    The goal of tutorials for beginners is simple: to build confidence. When you start a new software, it’s easy to feel intimidated. You might think you’re not good with computers.

    But that’s rarely true. You just haven’t learned this specific tool yet.

    Each tutorial you complete is a victory. Each task you master in the software is a step forward. These small wins add up.

    They build on each other. You start to recognize patterns. You learn how different tools work together.

    Your intuition grows. What once looked like a jumble of buttons starts to make sense.

    Don’t compare yourself to experts. They were beginners once too. They spent hours learning, just like you are now.

    Focus on your own progress. Celebrate the fact that you are taking the time to learn. That effort is commendable.

    As you get more comfortable, try more advanced tutorials. Or try tutorials for slightly different software. Your skills will transfer.

    Learning one program often makes learning the next one easier. You start to see the underlying logic of how software is designed. This makes you a more adaptable learner.

    Remember that feeling of accomplishment after completing your first simple project using a tutorial? Hold onto that. Use it as motivation.

    You proved to yourself that you could learn. You can do it again. And again.

    The journey from beginner to confident user is gradual. It’s not an overnight process. But with good tutorials and consistent practice, it’s absolutely achievable.

    Keep exploring, keep learning, and don’t be afraid to tackle new software. The digital world is yours to explore.

    Frequently Asked Questions about Software Tutorials for Beginners

    What is the best way to start learning a new software?

    The best way to start is by finding a beginner-focused tutorial. Look for video tutorials or step-by-step written guides that assume no prior knowledge. Official software websites and YouTube are great places to begin your search.

    How long should I spend on a tutorial?

    This depends on the tutorial’s length and complexity. For a short, simple task, it might take 10-20 minutes. For a more comprehensive introduction, it could be an hour or more. The key is to follow along and practice, not just watch. Don’t rush the process.

    Is it okay to use older tutorials if the software has updated?

    It can be okay, especially for understanding basic concepts. However, the interface might look different. Look for tutorials specific to your software version if possible. If not, focus on the core functions the tutorial teaches, as these often remain similar.

    What if I can’t find a tutorial for my specific software?

    Try searching for tutorials for similar software. The core concepts might be the same. Also, look for forums or communities dedicated to that software. Users there can often provide direct help or point you to resources. Don’t hesitate to ask questions!

    Should I try to learn everything at once?

    No, absolutely not. Trying to learn everything at once is the quickest way to get overwhelmed. Focus on one skill or one task at a time. Master the basics first. Then, gradually move on to more advanced features as you build confidence and understanding.

    How often should I practice after watching a tutorial?

    Consistent practice is key. Try to practice what you learned daily, or at least a few times a week. Even short practice sessions of 10-15 minutes can make a big difference. Repetition helps solidify the knowledge and skills.

    Conclusion

    Learning new software doesn’t have to be a confusing maze. With the right software tutorials for beginners, you can navigate this path with ease. Remember to choose clear, focused guides.

    Use them actively by following along and practicing. Don’t fear mistakes; they are part of learning. Keep practicing, and you’ll build confidence and skill over time.