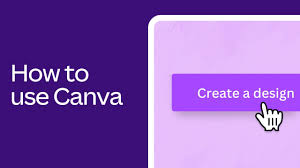
Beginner Guide To Canva
Canva is a free online design tool that lets you create graphics. It is user-friendly and offers many templates. You can make social media posts, presentations, posters, and more. It is great for beginners and people who need design help fast.
What is Canva?
Canva is an online platform. You use it to make all sorts of visual content. Think social media posts, posters, flyers, presentations, and even short videos.
It’s like a digital playground for your ideas. You don’t need to be a pro designer to use it. That’s its biggest magic.
It works through your web browser. You can also get an app for your phone or tablet. This means you can design almost anywhere.
It’s super handy when inspiration strikes.
How Does Canva Work?
The main idea behind Canva is ease of use. It uses a drag-and-drop system. This means you click on an element, like a picture or text box.
Then you move it where you want it. You can also resize things just by pulling on their corners. It feels very natural.
Canva has a huge library of templates. These are pre-made designs. You can pick one that fits what you need.
Then, you change the words, colors, and pictures to make it your own. It’s like having a head start on every project. This saves tons of time.
My First Canva Creation: A Simple Flyer
I remember the first time I tried Canva. I needed a flyer for a small community bake sale. I was honestly a bit nervous.
The last time I tried to design something, I used complicated software. It took me hours and I still hated it. My friends told me to try Canva.
I went to the Canva website. I searched for “flyer” and tons of options popped up. I picked one that looked cheerful.
It already had spaces for the event name, date, and time. I just clicked on the text and typed my own words. Then, I found a cute cupcake image in their library.
I dragged it into place. In maybe 15 minutes, I had a flyer I was actually proud of. It felt like a small miracle!
It showed me how easy design could be.
Canva’s Core Features for Beginners
Templates: Ready-made designs for almost anything.
Drag-and-Drop Editor: Easy to move and resize elements.
Element Library: Access to photos, graphics, shapes, and more.
Text Tools: Change fonts, sizes, colors, and add effects.
Brand Kit (Paid): Store your logos, colors, and fonts.
Understanding the Canva Interface
When you first open Canva, it might look like a lot. But it’s pretty organized. The main page shows you different design types.
You can search for what you need. On the left side of the editor, you’ll see options. These are for adding text, uploading your own photos, and finding elements.
The central area is your design space. This is where you build your creation. On the top, you have tools to change colors, fonts, and arrange items.
It’s designed to be intuitive. Most buttons tell you what they do. You can learn by clicking around.
Choosing the Right Template
Templates are your best friend in Canva. They give you a starting point. Think about your goal.
Are you making an Instagram post? A business card? A birthday invite?
Type that into the search bar.
Canva shows you many options. Look for ones that have a layout you like. Colors and fonts can be changed later.
Some templates might have a crown icon. These are for Canva Pro users, which you pay for. But there are tons of free ones too.
Pick one that feels close to your vision.
Quick Scan: Template Types
| Use Case | Canva Template Examples |
| Social Media | Instagram Post, Facebook Cover, Pinterest Pin |
| Marketing | Flyer, Poster, Business Card, Brochure |
| Presentations | Slide Deck, Whiteboard |
| Personal | Birthday Card, Invitation, Resume |
Adding and Editing Text
Once you have a template, you’ll want to add your words. Click on any text box in the template. You can then type your message.
To change the font, highlight the text. Then look at the top toolbar. You’ll see a dropdown menu for fonts.
Canva has thousands of free fonts to choose from.
You can change the size of the text the same way. There are also buttons for bold, italics, and alignment. You can even add effects to your text.
This might be a shadow or an outline. Don’t go too wild with effects, though. Keep it clean and easy to read.
Working with Images and Graphics
Canva has a massive library of photos and graphics. On the left menu, click “Elements.” Here you can search for almost anything. Type in “cupcake,” “beach,” or “office.” You’ll see images, stickers, and illustrations.
Some are free, and some are for Pro users.
To add an image, just click it. It will appear on your design. You can then drag it around.
Use the circles in the corners to make it bigger or smaller. If you upload your own photos, click “Uploads” on the left. Then click “Upload files.” You can drag your uploaded images onto your design too.
Color and Backgrounds
Changing colors is easy. Select an element (like text or a shape). Look at the top toolbar.
You’ll see a colored square. Click it to open the color palette. You can choose from preset colors.
You can also enter a specific color code if you know it. This is great for matching brand colors.
To change the background, click on the background itself. Then use the color square in the toolbar. You can also choose from patterns or upload your own background image.
Keep your color choices simple. Too many colors can make a design look messy. Think about what colors go well together.
Contrast Matrix: Normal vs. Concerning Design Choices
Readability: Clear font, good contrast between text and background.
Colors: Limited palette, colors complement each other.
Elements: Clean layout, not too cluttered.
Readability: Hard-to-read font, text blends into background.
Colors: Too many clashing colors, jarring.
Elements: Overcrowded, confusing message.
Adding Your Own Branding (Logos and Fonts)
If you have a logo, you can upload it. Click “Uploads” on the left. Then drag your logo file into the upload area.
Once it’s uploaded, click on it. It will appear on your design. You can resize it and move it.
Place your logo where it’s visible but not overpowering.
If you have specific brand fonts, you can use them too. If you have Canva Pro, you can add them to your Brand Kit. For free users, you can upload individual font files.
Just go to Uploads and find the font option. It’s important to be consistent with your branding.
Organizing Your Design Elements
As your design grows, it can get busy. Canva helps you organize. You can group elements together.
Select multiple items by holding Shift and clicking them. Then click the “Group” button at the top. Now they move as one unit.
You can also change the order of elements. Sometimes one element sits on top of another. Select the element.
Then click “Position” at the top. You can send it backward or bring it forward. This helps layer things correctly.
Designing for Different Platforms
Canva makes it easy to design for different places. When you start a new design, choose the right size. Canva has presets for Instagram posts, Facebook covers, YouTube thumbnails, and more.
These are already the correct dimensions.
If you start with a template, you can also resize it. Look for the “Resize” button. You might need Canva Pro for this.
But it’s handy for taking a poster design and making it fit a social media post. Just make sure to check how things look after resizing. Sometimes elements need minor adjustments.
Observational Flow: Creating an Instagram Story
- Start New Design: Search “Instagram Story” and pick a template.
- Add Background: Use a solid color or a photo from Elements.
- Place Text: Type your message. Choose a clear font.
- Add Graphics: Use stickers or illustrations from Elements.
- Upload Logo: Add your brand logo if needed.
- Animate (Optional): Use simple text or element animations.
- Review: Check if it’s eye-catching and easy to read.
- Download: Save as PNG or JPG.
Downloading Your Designs
Once your design is ready, you need to download it. Click the “Share” button in the top right. Then click “Download.” You’ll see different file types.
For most graphics, JPG is good. For images with transparent backgrounds or higher quality, PNG is better. For prints, PDF is often best.
Canva offers different quality options. If you’re printing, choose the highest quality. For web use, a smaller file size is often fine.
Make sure you download the right file type for where you’ll use it. This step is simple but very important.
Canva Pro vs. Free: What’s the Difference?
Canva has a free version that is very capable. It gives you access to many templates, photos, and elements. It’s perfect for beginners and casual users.
The paid version, Canva Pro, offers more.
Pro includes more premium templates and photos. It has a background remover tool. You can also resize designs instantly.
Plus, you get more storage and advanced brand kit features. For most people starting out, the free version is more than enough. You can always upgrade later if you need more.
Tips for Making Your Designs Look More Professional
Even with simple tools, you can make great designs. First, keep it simple. Don’t try to cram too much in.
White space is your friend. It makes designs easier on the eyes.
Use consistent fonts. Stick to one or two font families. Also, use a limited color palette.
Three to four colors usually works well. Pay attention to alignment. Make sure your text and images line up nicely.
This gives a clean, organized look. Good alignment makes a big difference.
Stacked Micro-Sections: Design Best Practices
Font Choice: Use clear, easy-to-read fonts. Limit to two per design.
Color Palette: Stick to 3-4 colors that work well together.
Hierarchy: Make the most important text the biggest and boldest.
Spacing: Give elements room to breathe. Avoid clutter.
Consistency: Use the same fonts and colors throughout a project or brand.
Real-World Scenarios: Using Canva
Let’s look at some places you might use Canva. A small business owner might create social media graphics for their shop. They can make sale announcements or product highlights.
They can use their brand colors and logo.
A teacher could design a colorful worksheet for their students. They might use fun illustrations and clear headings. A student could create a presentation for a class project.
They can make visually appealing slides instead of boring text ones. Even for personal use, like making a custom birthday card, Canva is perfect.
What This Means for You
If you’ve been wanting to make graphics but felt scared, Canva is for you. It lowers the barrier to entry for design. You don’t need expensive software or years of training.
When it’s normal to use Canva? Anytime you need a visual. For school projects, personal events, or even starting a small online business.
When should you worry? You shouldn’t worry about using Canva itself. It’s safe and easy.
The only time to pause is if a design looks too busy or is hard to read. Then, simplify it.
Quick Fixes and Tips
Need to make text bigger? Select it and use the size buttons. Can’t find a specific graphic?
Try different keywords in the search. Is your design too colorful? Reduce the number of colors used.
Is it too plain? Add a graphic or a background texture.
Always preview your download. Make sure everything looks as you expect. You can also use Canva’s collaboration features.
Share your design with a friend to get feedback before publishing. This helps catch mistakes. It’s a simple way to improve your work.
Frequently Asked Questions about Canva
Is Canva really free to use?
Yes, Canva has a very robust free version. You can create and download most designs with it. Some premium templates, photos, and features require a Canva Pro subscription, but the core functionality is free.
Do I need to be a designer to use Canva?
Absolutely not! Canva is designed for everyone. Its drag-and-drop interface and templates make it easy for people with no design experience to create great-looking graphics.
What kind of designs can I make with Canva?
You can make almost anything! Popular options include social media posts, flyers, posters, presentations, resumes, invitations, logos, infographics, and even simple videos.
Can I use my own photos and logos in Canva?
Yes, you can upload your own images, logos, and even fonts. Click on the “Uploads” tab on the left-hand side of the editor to add your files.
How do I download my finished design?
Click the “Share” button in the top right corner, then select “Download.” You can choose your file type (like JPG, PNG, or PDF) and quality settings.
What is the difference between Canva Free and Canva Pro?
Canva Pro offers more premium templates, stock photos, and advanced tools like a background remover and a magic resize feature. The free version is still very powerful for most everyday design needs.
Final Thoughts on Getting Started with Canva
Canva is a fantastic tool for anyone who needs to create visuals. It takes the complexity out of design. You can start making beautiful graphics today.
Don’t be afraid to explore. Play around with the tools and templates. You’ll be surprised at what you can create!